
")
To paint kitchen cabinets without sanding, clean them thoroughly with a degreaser, apply a liquid deglosser to dull the surface, then use a high-adhesion bonding primer. Follow with two coats of cabinet-grade paint using a brush and roller. This method skips sanding while still delivering a smooth, durable finish.
Your kitchen cabinets look tired. The color feels dated, the finish is dull, and a full renovation is nowhere in the budget. The good news? You don’t need to spend thousands — and you don’t need to spend a weekend buried in sawdust either. You can paint kitchen cabinets without sanding and still get a finish that looks clean, feels durable, and holds up to daily kitchen life.
Yes, it really works. Thousands of homeowners and DIYers have done it. The key isn’t skipping the hard work — it’s replacing the sanding step with the right products and prep process.
This guide walks you through every step so you get it right the first time.
Why You Can Skip Sanding (And What You Do Instead)
The traditional reason for sanding is to remove the surface gloss and scuff up the material so that primer and paint can stick. When you skip sanding, you need to replace that abrasion with other solutions — specifically, liquid deglossers and bonding primers.
That’s the whole secret. Instead of physically roughing up the surface, you use chemistry. A liquid deglosser chemically dulls the finish, and a bonding primer creates the grip that paint needs to cling properly.
Skipping sanding doesn’t mean you’re cutting corners or compromising the result. With the right preparation and materials, you can achieve a finish that’s just as smooth and durable as one done the traditional way.
There’s also a practical advantage beyond just saving effort. If your cabinets are in decent condition, skipping sanding lets you preserve their existing finish, which actually acts as a protective layer — potentially extending the life of your cabinets.
When This Method Works (And When It Doesn’t)
This approach isn’t for every situation, and being honest about that upfront will save you frustration later.
If your cabinets have peeling paint, deep scratches, or a very glossy finish, you may need to lightly sand them so paint can properly adhere. Cabinets with significant damage, or those made of materials like laminate, may also require special preparation.
If your cabinets are in good condition with smooth, non-glossy surfaces, sanding first is unnecessary. Cabinets with raw unvarnished wood, or surfaces that feel smooth to the touch, are also good candidates for skipping that step.
If you’re unsure, do a small test. Paint one door with the full prep method and check how the paint adheres after it dries. That five-minute test can save you from redoing your entire kitchen.
What You’ll Need Before You Start
Getting the right materials together before you begin makes the whole process flow smoothly. You don’t need anything exotic — most of this is available at any hardware store.
In addition to paintbrushes, rollers, and screwdrivers, you’ll need specific tools and materials to paint cabinets without sanding. These include a liquid deglosser, a bonding primer, and a quality paint suited for kitchen use.
For paint, acrylic latex or enamel paints are ideal for kitchen cabinets because durability and moisture resistance are key in that environment.
You’ll also want painter’s tape, drop cloths to protect countertops and floors, a microfiber cloth, and a small angled brush for getting into corners. A foam mini roller is especially useful for flat cabinet faces because it leaves a smoother finish than a brush alone.
Step 1 — Remove the Doors and Hardware

Start by taking down all cabinet doors, drawers, and hardware. This lets you paint every surface without obstructions. Use a screwdriver or drill to remove hinges, knobs, and handles. Label each door and piece of hardware so reassembly is easy later.
It might feel tempting to just paint around the hinges and leave everything in place. Resist that urge. Removing the doors lets you paint both sides flat, which dramatically reduces drips and brush marks. It also gives you full access to the cabinet frame.
Set up a simple painting area — a garage, basement, or covered patio works great. Lay doors flat on sawhorses or cardboard so you can paint them horizontally for the smoothest possible finish.
Step 2 — Clean Everything Thoroughly
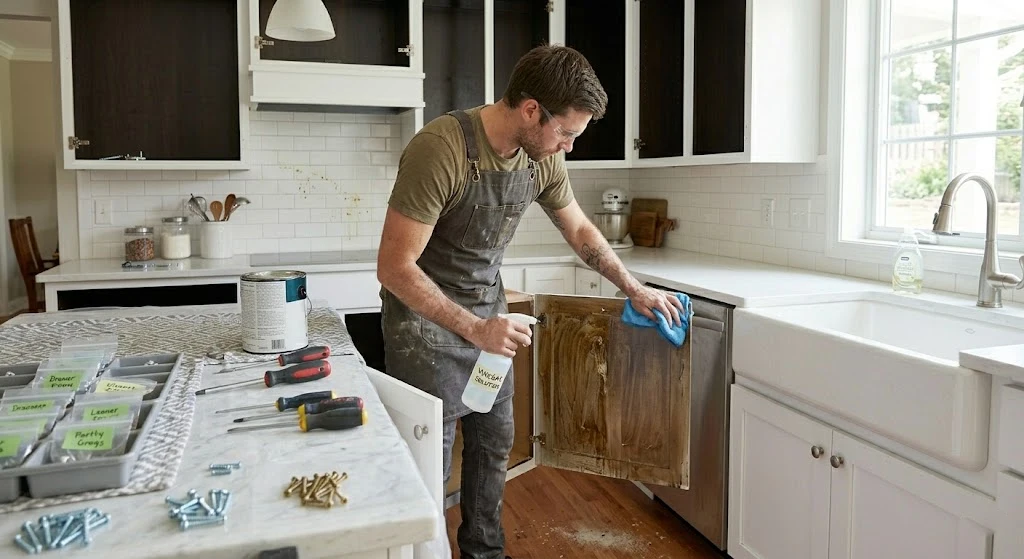
This step is the most important one in the entire process, and it’s the one people most often rush. Grease, cooking oil, and grime build up on kitchen cabinets over years of use. If any of that residue stays on the surface, your paint won’t bond no matter how good your primer is.
Clean all cabinet surfaces thoroughly with a grease-cutting soap or a vinegar-and-water solution. Pay extra attention to areas around the stove and other high-grease zones. Use a microfiber sponge or magic eraser to tackle stubborn spots, then rinse with water and allow everything to dry completely.
TSP (trisodium phosphate) or a TSP substitute is another popular option for this step. It cuts through grease very effectively and preps the surface well for what comes next. Wipe in the direction of the grain, and don’t skip any spots — even areas that look clean can have invisible residue.
Step 3 — Apply a Liquid Deglosser
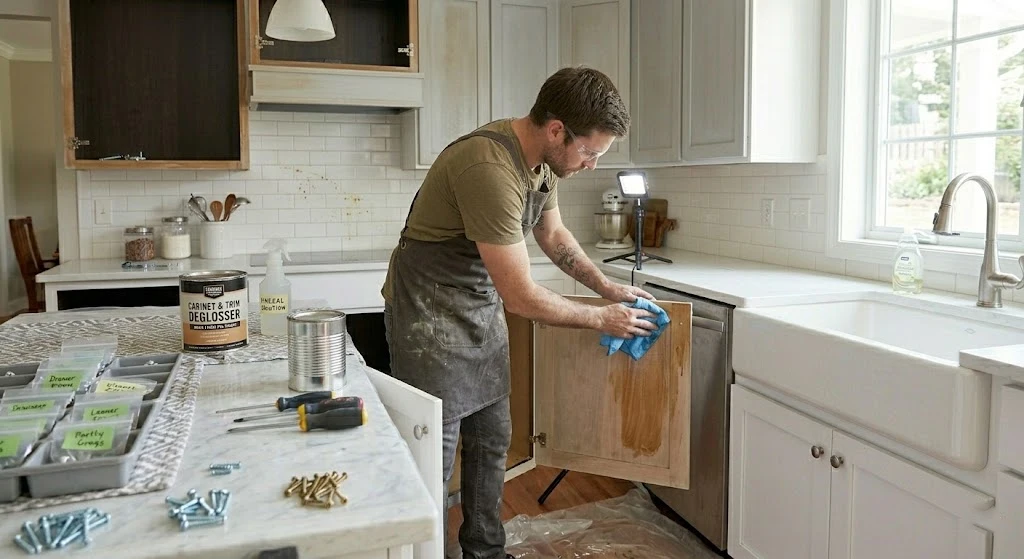
Once the cabinets are clean and dry, it’s time to apply the deglosser. This is the product that replaces the sanding step, so don’t skip it.
Pour a small amount of deglosser onto a clean cloth and apply it to the cabinet surfaces, following the manufacturer’s instructions. Work in sections to ensure even coverage, and apply the deglosser methodically to each part of the cabinet.
You’re not scrubbing the old finish off. You’re just lightly dulling it so the primer has something to grip. This is a quick wipe-down — you do not need to scrub the old finish off and get down to bare wood.
Make sure your workspace is well-ventilated during this step. Open windows, turn on a fan, and wear gloves. Some deglossers have strong fumes, though water-based formulas like Klean-Strip are gentler and still get the job done.
Step 4 — Prime with a Bonding Primer
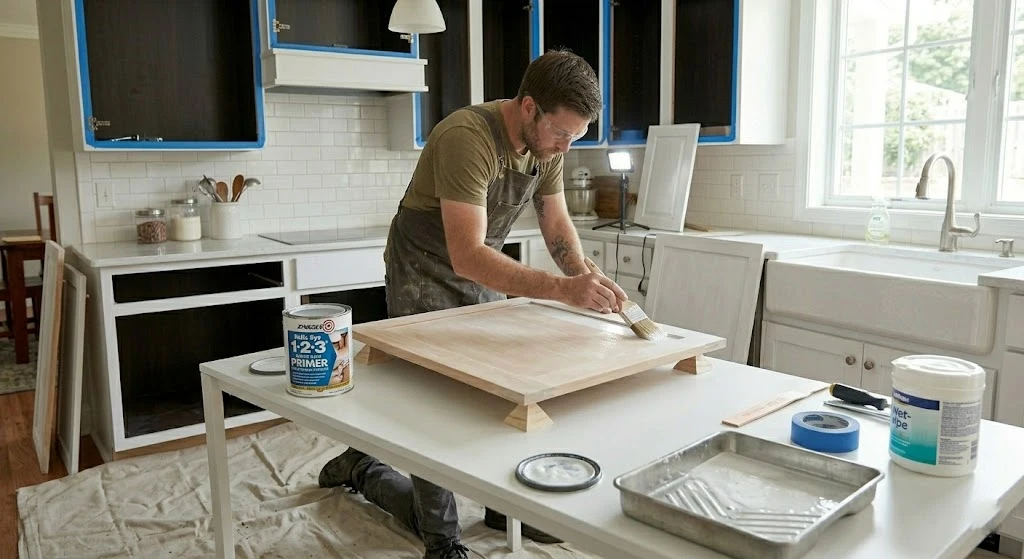
Primer is a must. Do not assume that a paint-and-primer-in-one product will be enough — especially when you’re not sanding down to raw wood. A high-adhesion primer is essential here.
BIN is an excellent option. It’s quick-drying, high-adhesion, and tintable. Tinting your primer when using dark top coats helps build color saturation faster. Other reliable primer brands include Rust-Oleum and Kilz.
Apply the bonding primer using a 2.5-inch angled brush or a small roller, working in the direction of the wood grain. Smooth out any drips before they dry, and let the primer cure fully according to the manufacturer’s instructions.
Use a foam roller for flat cabinet faces and drawer fronts, rolling in one direction for a smooth result. Apply thin, even coats to prevent drips, and let the primer dry for the time recommended on the label — typically one to four hours. Apply a second coat if needed for full coverage.
Step 5 — Paint Your Cabinets
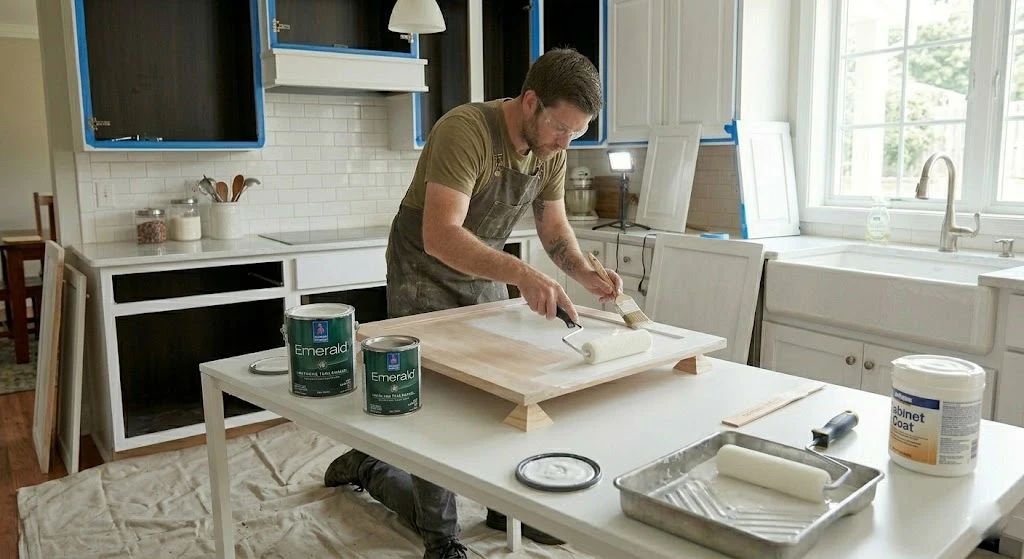
Now comes the satisfying part. With your primer dry and your surfaces properly prepped, you’re ready to apply the color.
Use a brush to apply paint in corners and crevices, then quickly roll over it with a nearly dry mini roller to remove any brush marks. A quality self-leveling paint helps avoid visible strokes and bubbles.
Stir the paint thoroughly before use to ensure even color and consistency — avoid shaking the can, as that introduces air bubbles. Use an angled brush for detailed areas, corners, and edges, and a foam roller for flat surfaces.
Plan for at least two coats of paint. Let the first coat dry completely before adding the second. Rushing this step is one of the biggest reasons DIY cabinet paint jobs end up chipping or looking uneven within a year.
Step 6 — Reassemble and Let It Cure
Once everything is dry and cured, reattach the cabinet doors, drawers, and hardware. Take your time lining everything up so the final result looks professionally finished.
Here’s a detail most guides gloss over: paint takes time to fully cure, even after it’s dry to the touch. Cabinet paint can feel solid in 24 hours but isn’t fully hardened for 7 to 30 days depending on the product. During that curing window, be gentle — avoid slamming doors, and clean up any spills with a soft cloth rather than scrubbing.
Tips for a Finish That Actually Lasts
A few small habits make a noticeable difference in the long-term durability of painted cabinets.
Always apply thin coats rather than thick ones. Thick coats take longer to dry, are more prone to drips, and often crack over time. Two thin coats will always outlast one thick one.
Keep the kitchen well-ventilated while you work. Humidity slows drying time and can trap moisture under the paint film, leading to bubbling or peeling later.
Don’t skip steps and give each coat the right dry time. A rushed job leads to brush strokes, visible imperfections, and flaking down the road.
If you notice any rough spots after the primer coat dries, a very light pass with fine 320-grit sandpaper — just to knock down high spots — is worth it. You’re not sanding for adhesion at this stage, just smoothing the surface before your color coats go on.
How Much Does This Project Cost?
One of the biggest reasons people choose this method is the cost savings. DIY kitchen cabinet painting typically costs between $200 and $600 for paint and supplies — compared to cabinet refacing, which can run from $4,300 to $10,100, or professional painting services that typically fall between $423 and $1,436.
When you also eliminate the cost of sandpaper, sanding blocks, and renting specialized tools, the savings add up further. For a kitchen that just needs a refresh rather than a structural overhaul, this is genuinely one of the best returns on a weekend project.
A Fresh Kitchen Without the Mess
Painting kitchen cabinets without sanding is completely doable for most homeowners, even those who’ve never picked up a paintbrush for a project like this before. The process takes patience, but it doesn’t take special skills.
Clean the surface completely. Degloss it. Prime it properly. Paint in thin coats. Let it cure. That’s the whole formula.
The difference between a cabinet paint job that chips after six months and one that looks great for years comes down almost entirely to prep. Do that part right, and the painting itself is the easy part. Your kitchen is a few days of steady work away from looking like a completely different space — no sanding required.