

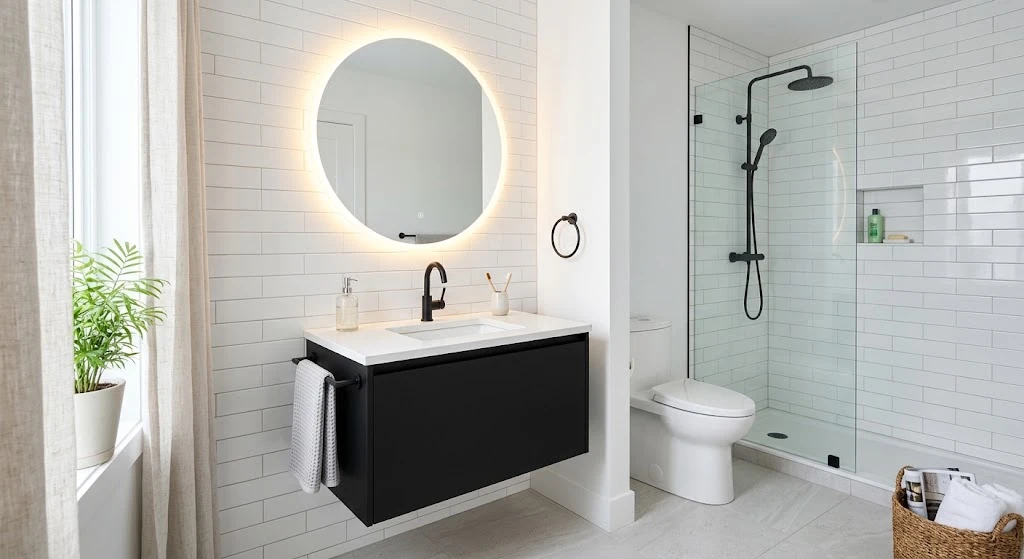
Remodeling a small bathroom is one of the most rewarding home improvement projects you can undertake. Bathrooms endure heavy daily use, and a outdated, cramped, or deteriorating bathroom quickly lowers your home’s comfort and overall property value. However, full scale professional bathroom renovations can easily run anywhere from $10,000 to over $25,000—even for compact spaces under 50 square feet.
The secret to achieving a sleek, modern, spa-like luxury bathroom without breaking the bank lies in smart spatial planning, preserving existing plumbing locations, using high-impact surface refinishing techniques, installing modern energy-efficient fixtures, and tackling tile, paint, and vanity upgrades as DIY tasks.
In this exhaustive DIY master guide, you will learn how to plan a small bathroom layout, save thousands by keeping existing plumbing lines, refinish tubs and tiles instead of replacing them, install floating vanities to maximize floor space, choose water-efficient fixtures, and tile like a seasoned pro.
Step 1: Establish a Realistic Budget and Spatial Layout
Before swinging a sledgehammer, you must evaluate what needs replacing and what can be cosmetically upgraded.
1. The Golden Rule: Keep the Plumbing Layout Intact
Moving water supply pipes, drain lines, or vent stacks through walls and concrete subfloors is the fastest way to blow through a renovation budget. Relocating a toilet or shower drain alone adds $1,500 to $4,000 in plumber labor fees. Keep your toilet, sink, and shower/tub in their exact current locations and focus your budget on surface aesthetics, lighting, and storage.
2. Spatial Visual Tricks for Small Bathrooms
- Use Light & Neutral Color Palettes: White, soft beige, light gray, or subtle sage green walls bounce ambient light around compact spaces, making cramped bathrooms feel instantly larger.
- Install Continuous Flooring: Running large-format floor tiles continuously from the main floor through a curbless glass shower eliminates visual breaks, making the room look expansive.
- Go Vertical with Storage: Utilize open floating shelves above the toilet and recessed medicine cabinets to keep countertops free of clutter.
Step 2: Demolition and Surface Prep Safety
Bathroom demolition requires precision to avoid damaging hidden electrical wiring or water lines inside walls.
Demo Safety Checklist:
- Shut Off Main Water Valves: Turn off the main water shutoff valve to the bathroom before removing fixtures.
- Protect Drain Openings: Stuff old rags into exposed floor drains and pipe stubs to block sewer gas backup and prevent debris from falling down drains.
- Inspect Subflooring: Once old vinyl or tile is removed, inspect the plywood subfloor around the toilet base and bathtub edge for water rot or soft spots. Replace soft plywood sections with fresh exterior-grade subfloor panels before installing new flooring.
Step 3: Refinish Tub and Tiles (Save up to 80% vs. Replacement)
Tearing out an old cast-iron or steel bathtub costs hundreds in labor, dump fees, and wall repair. Tub refinishing restores old, discolored, or stained porcelain tubs for a fraction of replacement costs.
DIY Bathtub & Tile Reglazing Steps:
- Deep Clean & Strip Scale: Clean the tub thoroughly with a heavy-duty acid cleaner to remove soap scum, body oils, and lime deposits.
- Etch the Surface: Sand the porcelain surface using 120-grit wet/dry sandpaper to dull the glossy finish, giving new epoxy paint a porous surface to grip.
- Apply Epoxy Tub & Tile Refinishing Kit: Spray or brush on a high-grade 2-part acrylic epoxy resin coating (such as Rust-Oleum Tub & Tile Refinishing Kit). Apply two thin, smooth coats, allowing proper cure times according to package directions. The result is a glossy, high-shine white finish that looks brand new.
Step 4: Install a Space-Saving Vanity and Sink
Large, bulky floor-standing vanity cabinets choke floor space in small bathrooms.
1. Choose a Floating or Narrow-Depth Vanity
- Floating (Wall-Mounted) Vanities: Mounting a vanity cabinet onto wall studs elevates it off the tile floor, leaving exposed floor space beneath. This visual transparency instantly makes small bathrooms feel roomier.
- Vessel or Undermount Sinks: Pair compact vanity cabinets with sleek undermount or shallow vessel sinks to retain maximum interior drawer storage space for toiletries.
2. Upgrading Vanity Faucets
Install single-handle brushed nickel, matte black, or champagne bronze faucets. Single-handle models require only one mounting hole, preserving precious countertop space.
Step 5: Master Low-Cost Floor and Wall Tiling
Tiling is where DIYers can achieve professional, high-end design aesthetics at low material costs.
1. Material Selection: Large-Format vs. Mosaic
- Large-Format Floor Tiles (12×24 inches): Requires fewer grout lines, which reduces visual clutter and simplifies ongoing grout cleaning.
- Subway Wall Tiles (3×6 inches): Classic, timeless, and extremely affordable (often under $1.50 per square foot). Lay subway tile in a standard running bond or modern vertical stack pattern along shower walls.
2. Step-by-Step Tiling Process:
- Prep the Substrate: Lay cement backerboard (like Durock or HardieBacker) over subflooring and apply a painted-on liquid waterproofing membrane (such as RedGard) across shower wall zones.
- Apply Thin-Set Mortar: Comb polymer-modified thin-set mortar across backerboard using a notched trowel.
- Set Tiles with Spacers: Press tiles firmly into wet mortar, using tile leveling clips to ensure all tile faces sit flush without height edges (“lippage”).
- Grout and Seal: Allow mortar to cure for 24 hours. Spread stain-resistant epoxy or acrylic grout into tile joints using a rubber float. Sponge away excess film, and apply a silicone grout sealer once dry.
Step 6: Upgrade Lighting, Mirrors, and Ventilation
Proper lighting and ventilation are essential for keeping small, damp bathrooms mold-free and visually inviting.
1. Double the Light with Frameless Mirrors
Replace outdated oak medicine cabinets with large, frameless LED light-up mirrors or arch-topped wall mirrors. Large mirrors reflect light across the room, creating an optical illusion of double the floor area.
2. Layered Warm Lighting
Avoid relying on a single overhead bulb. Combine ambient ceiling recessed lights with wall sconces mounted at eye level on either side of the vanity mirror to eliminate harsh face shadows during grooming.
3. Install an Efficient Quiet Exhaust Fan
Bathroom humidity breeds mold and mildew, damaging paint and ceiling drywall. Install a high-CFM, low-sone (quiet operation) exhaust fan vented directly to the home’s exterior to quickly extract steam after hot showers.
Step 7: Finishing Touches and Hardware Upgrades
Small details tie a budget renovation together into a cohesive, high-end space:
- Replace Hardware Finish-Cohesive: Match your door hinges, cabinet pulls, towel bars, toilet flush handle, and showerhead with a single metal finish (e.g., all matte black or all brushed brass).
- Install Glass Shower Doors: Ditch heavy dark shower curtains that divide compact bathrooms into smaller segments. Install clear frameless glass panels or sliding glass doors to keep sightlines open end-to-end.
- Paint with Moisture-Resistant Paint: Finish walls with satin or semi-gloss interior paint formulated with anti-microbial mildew protection.
Quick Reference Summary Checklist
- Keep existing plumbing locations to save thousands in trade labor fees.
- Refinish old cast iron or acrylic tubs using a 2-part epoxy tub glaze kit.
- Install a floating vanity cabinet to expose more floor area.
- Lay large-format 12×24 floor tiles and affordable white subway shower wall tiles.
- Replace bulky medicine cabinets with large LED frameless mirrors to reflect light.
Final Thoughts
Remodeling a small bathroom on a budget does not mean sacrificing luxury or style. By keeping plumbing in place, refinishing solid existing fixtures, making strategic material choices like subway tile and floating vanities, and completing the installation work yourself, you can transform a cramped, outdated bathroom into a pristine, high-end sanctuary that increases your home’s resale value for years to come.
