

How to Seal Leaky Ductwork : To seal leaky ductwork, clean the area around the leak, then apply mastic sealant with a paintbrush or press UL-rated foil tape firmly over gaps and seams. For large or hidden leaks, professional Aeroseal treatment works from the inside out. Always avoid standard duct tape — it fails quickly.
If your energy bills keep climbing and some rooms never feel comfortable no matter what you do with the thermostat, the problem might be hiding in your walls and ceiling. Learning how to seal leaky ductwork is one of the most impactful home improvement tasks you can tackle — and a lot of it is DIY-friendly.
The good news? You don’t need to be an HVAC technician to fix most duct leaks. With the right materials and a bit of patience, you can stop conditioned air from escaping and start feeling the difference in both comfort and cost.
Why Leaky Ductwork Is a Bigger Problem Than You Think
Most homeowners have no idea how much air they’re losing. According to the U.S. Department of Energy, duct leaks can cause up to 30% of conditioned air to be lost before it ever reaches the rooms it’s meant to heat or cool. That’s like leaving a window open while your furnace or air conditioner runs full blast.
A typical home loses 20–30% of conditioned air due to holes, leaks, disconnected air ducts, and poorly installed ducts, according to ENERGY STAR. That wasted air means your HVAC system runs longer, works harder, and breaks down sooner — all while your utility bill quietly climbs.
The problem goes beyond money, too. Leaky air ducts can negatively impact indoor air quality, and may worsen respiratory problems such as allergies or asthma. When return ducts pull in air from unconditioned spaces like crawlspaces or attics, that dusty, potentially moldy air gets pushed right into your living room.
How to Tell If Your Ductwork Is Leaking
Before you start sealing, you need to find the leaks. Some signs are obvious. Others are easy to overlook until you know what to look for.
Common signs include hot or cold spots — if certain rooms are always too warm in summer or too chilly in winter, your ducts may be leaking air before it reaches them.
A hissing sound during your HVAC system’s operation could be conditioned air escaping through duct leaks. That whistling noise isn’t just annoying — it’s money leaving your home in real time.
If dust seems to accumulate quickly no matter how often you clean, you may have leaky air ducts pulling debris in from unconditioned spaces.
Do a hands-on inspection when your system is running. Start at the air handler and follow the ductwork through your basement, attic, or crawlspace. Look at exposed air ducts for holes or gaps at connection points. For larger leaks, you may be able to feel hot or cold air escaping — connection points are the most common trouble spots.
What You’ll Need Before You Start
Getting the right materials makes all the difference. The biggest mistake most homeowners make is reaching for the cheap gray duct tape at the hardware store. That stuff fails fast. Temperature swings cause it to peel away within months, leaving the leak wide open again.
Here’s what actually works:
Mastic sealant is the gold standard for permanent repairs. It’s a thick, paste-like compound that you brush onto seams and joints. Once it cures, it forms a flexible, airtight bond that holds up for years.
UL-rated aluminum foil tape (not regular duct tape) is a solid second option for smaller gaps and accessible seams. Any foil or tin tape rated by Underwriters Laboratory (UL) is approved for duct sealing — just avoid standard duct tape, as it’s not effective and will peel away due to temperature changes.
Sheet metal screws are useful when sections of rigid ductwork have pulled apart. You push the sections back together and fasten them before sealing.
You’ll also want work gloves, safety glasses, a dust mask, long sleeves, and a stiff paintbrush or putty knife for applying mastic. Most ductwork is surrounded by fiberglass and located in dusty, dirty areas, so protect yourself before getting started.
How to Seal Leaky Ductwork: Step-by-Step
Step 1: Clean the Surface Around the Leak
This step is easy to skip — don’t. Duct sealing products will not adhere properly to dust and dirt, so use a rag and a mild cleaning solution to wipe down the area before applying anything. Let it dry completely.
Step 2: Fix Any Disconnected Sections First
If you find sections of ductwork that have pulled apart entirely, reconnect them mechanically before sealing. Push the sections together and fasten them with sheet metal screws. Leaks a quarter-inch wide or more need to be fixed this way first. Sealant alone won’t bridge a gap that large reliably.
Step 3: Apply Mastic to Joints and Seams
Using a brush or putty knife, apply a generous amount of duct mastic to the seams and joints where leaks are detected. Make sure the mastic covers the entire leak area and extends a few inches beyond the edges for a secure seal.
Don’t be shy with the application. Mastic should go on thick. Work it into any visible crack or gap, and smooth it outward in all directions so nothing is left uncovered. Water-based mastic duct sealant is the best option because it cleans up easier and holds up for a long time.
For fiberglass mesh tape under the mastic, this combination is even stronger on wider gaps — press the mesh into the wet mastic, then apply another layer on top.
Step 4: Use Foil Tape for Straight Seams and Connections
Foil and mastic tapes offer a quick and simple solution for minor ductwork leaks. Unlike standard duct tape, these UL-listed options are designed specifically for HVAC applications and provide a strong, long-lasting seal — especially for flexible and metal ducts.
Cut a piece long enough to overlap generously on either side of the gap. Press the tape firmly onto the duct, ensuring there are no wrinkles or bubbles, and smooth it out for maximum adhesion. Wrinkles create weak spots where air can push through over time.
Step 5: Let Everything Cure Before Running the System
It generally takes 24 to 48 hours for duct mastic to fully cure and dry. Avoid using your HVAC system during this time to ensure the sealant sets properly. Running the system too soon can cause the mastic to shift before it hardens, reducing the effectiveness of the seal.
Step 6: Insulate After Sealing
Once your seals are set, wrap exposed ducts in unconditioned spaces with proper insulation. Fiberglass insulation blankets work well. This step prevents energy loss through the duct walls themselves — not just at the seams — and reduces condensation issues in humid climates.
When DIY Isn’t Enough: The Case for Aeroseal
Mastic and foil tape work great on accessible ductwork. But plenty of leaks hide inside walls, behind ceilings, and in places no paintbrush can reach. That’s where professional Aeroseal technology steps in.
Aeroseal is a proven method that doesn’t require physical access to the leaky duct and doesn’t require removing drywall. The product can only be applied by a trained professional and is suited for any kind of duct.
Here’s how it works: a technician pressurizes the duct system and pumps in a fine aerosol mist of sealant particles. The particles are too light to settle in the middle of the duct, so they drift toward wherever air is escaping and bond together at the leak site — sealing it from the inside.
This inside-out approach ensures that even hidden leaks are effectively sealed and can lead to long-term cost savings and improved comfort.
The cost is higher than a DIY job, but for homes with significant duct leakage or inaccessible ductwork, it can pay for itself quickly through lower energy bills.
How to Seal Leaky Ductwork in Specific Problem Areas
Flexible Duct Connections
Flexible ducts are more prone to pulling loose at connection points, especially as they age. Use foil tape to wrap the connection tightly, then add a layer of mastic over the tape for extra security. Some contractors use draw bands (metal clamps) to hold flexible ducts firmly in place before sealing.
Duct Boots and Register Connections
The spot where a duct meets a floor, wall, or ceiling register is a common leak point. Check for gaps around the boot where it meets the drywall or subfloor. Caulk works well for sealing these small edge gaps between the boot and the surrounding surface. Use mastic for the duct connection itself.
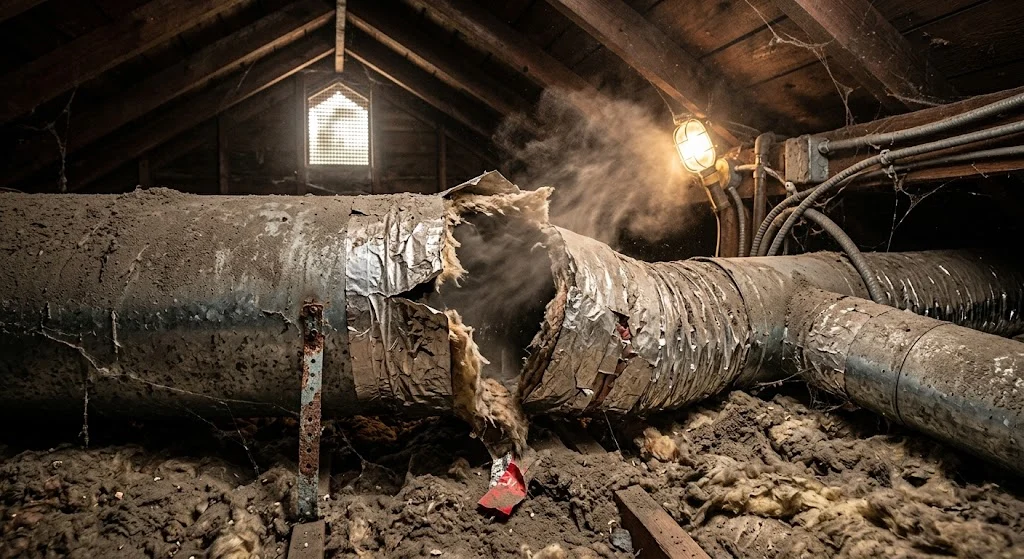
Attic and Crawlspace Ductwork
These areas tend to have the most severe leaks because temperature swings and physical settling take a heavy toll over time. In older homes, 10 to 25% of heated or cooled air may be leaking out of ductwork — and these leaks can also drag in dust, allergens, and moisture, hurting indoor air quality and comfort. Inspect these spaces carefully and prioritize sealing here first.
Mistakes to Avoid When Sealing Ductwork
Using standard duct tape is the number one mistake — it’s been mentioned already, but it bears repeating because it’s so common. The gray fabric tape sold everywhere simply isn’t designed for HVAC temperatures and will fail.
Skipping the cleaning step is a close second. Mastic won’t stick to dirty metal, and foil tape won’t either. A quick wipe-down takes five minutes and makes the repair last years longer.
Don’t ignore obvious structural damage. If you find rusted, crushed, kinked, or chewed ducts, it’s time to call a professional rather than trying to patch around the problem. Severely damaged ductwork needs replacement, not just sealing.
Finally, don’t seal supply ducts and ignore return ducts. Both sides of the system leak, and fixing only one side still leaves significant efficiency losses on the table.
The Payoff: What Sealed Ductwork Does for Your Home
Properly sealed ductwork changes how your whole home feels. Rooms that used to be stubbornly cold in winter or warm in summer start to reach the temperature you actually set. Your HVAC system runs shorter cycles because it’s not fighting to compensate for lost air. And your energy bills reflect that improvement every single month.
By correctly sealing leaky ductwork, households can save energy, increase comfort, and extend the life of their HVAC systems. The Department of Energy estimates that sealing and insulating ducts in unconditioned spaces can save a typical home 10–20% on heating and cooling costs.
Better air quality is another reward. Once the leaks are closed, your system stops pulling in attic dust, crawlspace moisture, and outdoor allergens. For anyone in the household with asthma or seasonal allergies, that difference can be significant.
Conclusion
Sealing your ductwork is one of those home improvement tasks that quietly improves everything — comfort, air quality, and monthly costs — without changing anything visible. You don’t need special skills to handle most repairs, just the right materials and a willingness to get a little dirty in the attic.
Start with a thorough inspection. Clean the surfaces before you apply anything. Use mastic sealant on joints and seams, UL-rated foil tape on straight connections, and call a professional for hidden leaks or seriously damaged sections. Skip the cheap gray tape — it’s the one shortcut that will send you right back to square one.
Your HVAC system is already working hard. Give it a fighting chance by making sure the air it moves actually reaches the rooms you live in.