

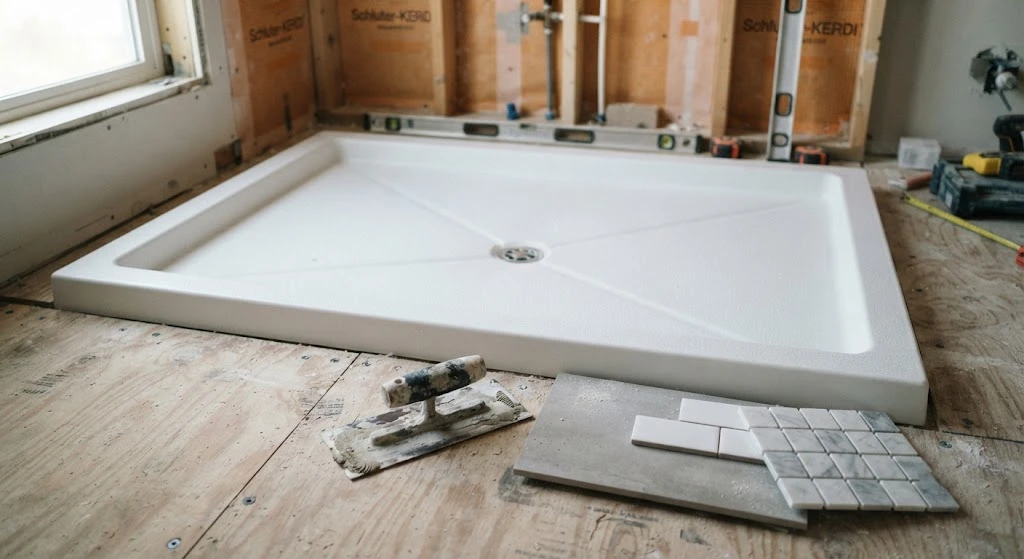
Planning a shower remodel? A tile shower pan kit is one of the smartest upgrades you can make. It skips the messy, time-consuming mortar bed and gives you a ready-to-tile base that’s already sloped perfectly toward the drain.
But how much should you actually expect to pay?
In 2026, most tile shower pan kits cost between $700 and $1,900. Your final price depends on the size of the tray, the drain style you pick, and which brand you choose — foam-based systems like Wedi and Schluter Kerdi, or the polyurethane-based Tile Redi line.
Keep in mind: this price covers the base, curb, and waterproofing parts only. Tile, thin-set mortar, and labor costs come separately.
Let’s break down exactly what you’re paying for, how the top brands compare, and how to avoid the leaks and mistakes that trip up first-time installers.
What’s Inside a Tile Shower Pan Kit?
A tile shower pan kit is a pre-sloped shower base built to skip the old-school mortar bed process entirely. Instead of building a slope by hand and hoping it drains correctly, you get a factory-made pan that’s already engineered to do the job right.
Most kits include:
- The pre-sloped base (or “pan”)
- A curb piece, if you want a step-over threshold
- A waterproofing membrane or coating, either built into the material or added separately
The installation logic is simple: set the pan down, seal the seams, then tile directly on top. No guesswork, no mortar bed, no risk of water pooling in the wrong spot.
Some systems, like the Schluter Kerdi-Shower-Kit, ship the tray and the waterproofing membrane as separate pieces that you assemble during installation. Others, like Tile Redi’s Redi Base line, come with the waterproofing already molded into the polyurethane shell — so there’s one less step to worry about.
Tile Shower Pan Kit Cost by Brand and Size (2026)
Cost varies quite a bit depending on the brand, the tray’s dimensions, and the drain setup you choose. Bigger trays, linear drains, and built-in benches all add to the price tag. Here’s what current retail listings show:
| Kit Type | Typical Cost Range | What Drives the Price Up |
|---|---|---|
| Tile Redi Base 36×36 (single curb) | $700 – $800 | Drain finish, number of curbs |
| Tile Redi Base’N Bench (built-in bench) | $1,000 – $1,150 | Bench size, drain placement |
| Tile Redi Redi Trench (linear drain) | $850 – $950 | Trench length, grate style |
| Wedi Fundo shower pan (foam, pan only) | $700 – $1,830 | Pan footprint, whether wall boards are included |
| Schluter Kerdi-Shower-Kit (tray, curb, membrane) | $800 – $1,900 (estimated) | Tray size, ABS vs. PVC drain body |
Keep in mind: these numbers reflect current retailer and manufacturer pricing — not a fixed national average. Your actual cost will shift based on your local supplier, shipping fees, and whether you buy a complete kit or assemble the pieces yourself.
Foam vs. Polyurethane: Which Shower Base Material Wins?
Not all shower pans are made from the same material, and the difference matters more than you’d think.
Wedi and Schluter both build their pre-sloped bases from expanded polystyrene (EPS foam). This foam is lightweight, holds up well under the weight of tile once installed, and cuts easily with a basic utility knife — handy if you need to notch around plumbing.
Tile Redi, on the other hand, uses solid polyurethane. It’s heavier than foam, but it arrives pre-pitched from the factory with the correct slope already built in, which means less on-site adjusting for you.
Neither material beats the other across the board:
- Foam systems give you more flexibility to customize size and drain placement on-site.
- Polyurethane systems arrive closer to finished, so there’s less fitting work involved.
Your choice really comes down to whether you need a standard size (go polyurethane) or a custom fit (go foam).
Curbless and Linear Drain Shower Pan Options
Thinking about a curbless, barrier-free shower? You’ll want a pan built specifically for zero-entry use. These designs slope from every direction toward a single linear drain along one wall, so the shower floor stays flush with the rest of the bathroom — no step, no curb, no tripping hazard.
Popular curbless options include:
- Tile Redi’s Redi Trench and WonderFall Trench lines
- Wedi’s linear drain version of its Fundo system
One important note: curbless designs work best when your subfloor allows for a slight recess. The pan needs room to slope downward without raising the shower floor above the rest of the room. This is far easier to achieve in slab-on-grade homes than in homes with a standard wood-framed subfloor, so check your framing situation before committing to a curbless layout.
Tile Redi vs. Wedi vs. Schluter Kerdi: Which Should You Choose?
All three brands are solving the same core problem — skip the mud bed, keep water out, and get to tiling faster. But they take different paths to get there.
| Feature | Tile Redi | Wedi | Schluter Kerdi |
|---|---|---|---|
| Base material | Solid polyurethane | EPS foam | EPS foam |
| Waterproofing | Built into the pan | Foam plus liquid or sheet coating | Separate Kerdi membrane |
| Bench option | Yes (Base’N Bench line) | Yes (separate bench pieces) | Limited, mostly custom-built |
| Best for | Fast installs, standard layouts | Custom sizing, curbless builds | Homeowners already using Kerdi wall board |
Quick takeaway:
- Standard bathroom footprint, want speed? Tile Redi’s pre-pitched pans get you to tile fastest.
- Odd-shaped or custom bathroom? Wedi or Schluter’s foam systems give you the flexibility to adjust on-site.
How to Install a Tile Shower Pan Kit (Step by Step)
- Prep the subfloor. Start with a clean, flat, structurally sound surface. Plywood or cement backer board both work well as a base layer.
- Dry-fit the pan first. Before applying any adhesive, make sure the drain lines up correctly with your existing plumbing.
- Set the pan. Use thin-set mortar or the manufacturer’s recommended adhesive, then seal the seams and drain connection according to the kit’s instructions.
- Waterproof the seams. Foam kits usually need a liquid coating or membrane strip at the seams. Polyurethane kits like Tile Redi often skip this step since the pan is already watertight.
- Let it cure fully. Don’t rush this part — curing time is one of the biggest factors in whether a shower pan lasts. Follow the full cure time on the product label, even if it looks dry sooner.
Common Mistakes That Cause Leaks Later
Even a great kit can fail if it’s installed the wrong way. Watch out for these common errors:
- Skipping the dry-fit. Some homeowners glue the pan down right away, only to discover the drain doesn’t line up with the trap below.
- Undersizing the drain connection. If your shower pan kit uses a different drain body than your existing plumbing, you’ll need an adapter. Guessing instead of checking the spec sheet is a fast track to leaks down the road.
- Skipping seam sealant on foam-based kits. The pan itself won’t leak, but an unsealed seam between the pan and the wall waterproofing will let moisture through over time.
DIY Installation vs. Hiring a Pro
Installing a pre-sloped shower pan kit is realistic for an intermediate DIYer who’s tiled before and feels comfortable working with thin-set mortar. The kit does the hardest part — calculating the slope — for you.
That said, bring in professional help when:
- The drain location needs to move. This involves cutting into existing plumbing lines, which calls for a licensed plumber.
- The subfloor shows soft spots, water staining, or rot. Have a contractor assess the framing before setting any pan on top. A pan installed over a compromised subfloor will fail no matter how good the kit is.
Final Thoughts: Choosing the Right Tile Shower Pan Kit
For a standard rectangular shower with no bench, Tile Redi’s pre-pitched pans get you to tile the quickest. For a curbless build or an unusual footprint, a foam system from Wedi or Schluter gives you more room to adjust the size on-site.
Whichever brand you choose, always match the drain body to your existing plumbing before ordering, and budget for any membrane or sealant accessories sold separately from the base tray. A tile shower pan kit can save you real time compared to a traditional mortar bed — but only if the drain lines up and the seams are sealed correctly the first time.
Frequently Asked Questions
Is a tile shower pan kit waterproof on its own?
The pan itself is waterproof, but the full shower assembly isn’t watertight until the seams, curb, and wall transitions are sealed with the membrane or coating the manufacturer specifies. Skipping this step is the most common cause of early leaks.
Can I install a tile shower pan kit over a wood subfloor?
Yes, as long as the subfloor is flat, structurally sound, and free of soft spots or water damage. Plywood or cement backer board both work as the base layer under most kits.
Do I need a plumber to install a shower pan kit?
Not necessarily. If the drain stays in its current location and you’re comfortable with basic tile work, you can likely handle it yourself. You’ll need a licensed plumber if the drain needs to move or if you’re replacing old cast iron or lead drain fittings.
What size shower pan kit do I need?
Measure your existing shower footprint or the space you plan to frame out, then choose the closest standard size. Most brands offer sizes from 32×32 up to 48×72, plus custom sizing on foam systems like Wedi.
Are foam shower pans as durable as polyurethane pans?
Yes, once tiled. EPS foam has high compressive strength and supports the weight of tile and thin-set just as well as polyurethane. The real difference is in how each material is manufactured and shaped — not in long-term durability.
Stay with zillohome for more practical home improvement guides, real-world cost breakdowns, and expert tips to help you renovate smarter.
