

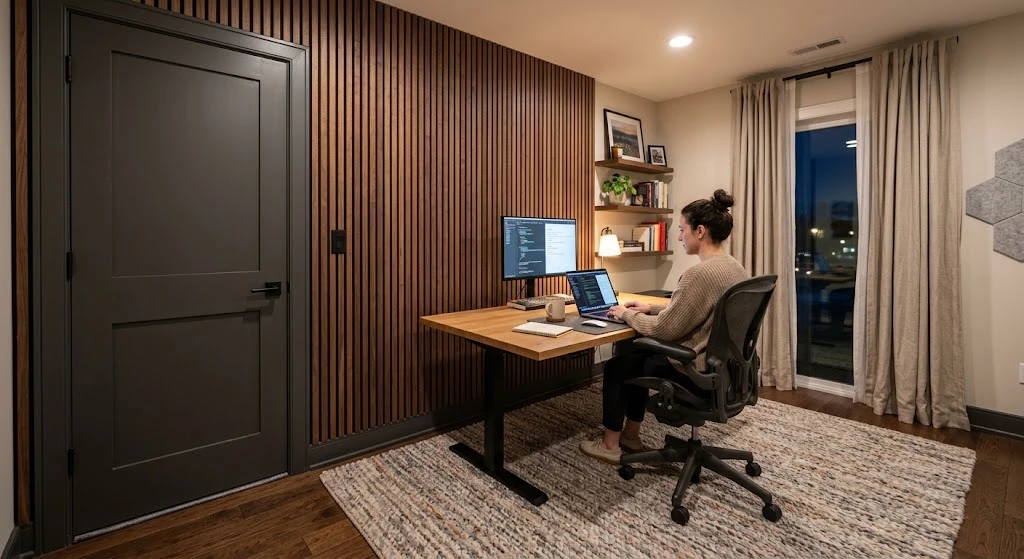
Whether you are building a dedicated home recording studio, setting up a productive work-from-home office, dampening loud street traffic, or simply seeking peace and quiet from noisy neighbors and heavy footsteps, learning how to soundproof a room effectively is one of the most rewarding home improvement projects you can undertake.
However, soundproofing is widely misunderstood. Many homeowners spend hundreds of dollars on thin acoustic foam egg-crate panels, expecting them to block outside street noise, only to find they do almost nothing to stop sound from entering or escaping. Acoustic foam absorbs mid-to-high frequency echoes inside a room, but it lacks the structural density required to block external sound transmission.
In this exhaustive DIY master guide, you will learn the core physics of acoustics, the critical difference between sound absorption and sound blocking, how to seal air leaks, isolate structural vibrations, add dense acoustic mass to walls and doors, and soundproof windows on a realistic budget.
Step 1: Understand the Physics of Soundproofing
To effectively block sound, you must treat the four fundamental acoustic principles: Mass, Decoupling, Absorption, and Damping.
1. Sound Blocking vs. Sound Absorption
- Sound Absorption: Controls internal acoustics, echo, and reverberation within a space using porous materials like foam panels, acoustic batts, and thick drapes.
- Sound Blocking: Prevents acoustic energy from passing through barriers (walls, floors, doors) using heavy mass and structural isolation.
2. Airborne Sound vs. Impact Sound
- Airborne Noise: Waves traveling through air (e.g., voices, TV audio, street traffic, dog barking).
- Impact Noise: Physical vibrations caused by direct structural kinetic contact (e.g., heavy footsteps on hard floors, slamming doors, vibrating bass subwoofers).
3. The 4 Soundproofing Pillars
- Mass: Heavy, dense materials (like Green Glue, mass-loaded vinyl, or thick drywall) make it difficult for sound waves to physically move a wall structure.
- Decoupling: Mechanically separating structural contacts (using resilient channels or double-stud walls) so vibration cannot travel directly through wall studs.
- Absorption: Trapping sound energy inside hollow cavities using dense insulation (such as rockwool batts).
- Damping: Converting kinetic sound energy into harmless heat using viscoelastic damping compounds (like Green Glue sandwiched between drywall layers).
Step 2: Seal Air Leaks (The Lowest Cost, Highest Impact Step)
Sound travels like water—if air can pass through a crack or gap, sound will travel right through it. Sealing perimeter gaps offers the highest noise reduction per dollar spent.
1. Seal Door Perimeter Seams
Standard interior hollow-core doors act like giant acoustic amplifiers.
- Install Heavy-Duty Door Weatherstripping: Apply dense neoprene or silicone weatherstrip seals around the top and side door frame stops.
- Install a Solid Door Sweep: Attach an adjustable neoprene rubber bottom door sweep to eliminate the 1/2-inch air gap between the door and floor.
2. Seal Electrical Outlets and Baseboards
Electrical switch boxes cut directly through wall drywall, creating direct noise flues into adjoining rooms.
- Remove outlet faceplates and install flame-retardant foam acoustic outlet gaskets.
- Seal the outer perimeter gap between the electrical plastic box and drywall using acoustic caulking (a non-hardening sealant that stays flexible and never cracks).
- Apply acoustic caulk along the bottom seam where baseboards meet hard flooring.
Step 3: Soundproof Windows (Blocking Traffic and Street Noise)
Single-pane and thin double-pane glass windows are major weak points for outdoor traffic, sirens, and barking dogs.
1. Build or Buy DIY Acoustic Window Inserts
Window inserts are clear acrylic or laminated glass panels edged with a flexible silicone gasket that press-fit directly into the interior frame of existing windows. This creates a tight air seal and a 2-to-4-inch dead air space that dampens incoming noise by up to 50–70%.
2. Install Noise-Blocking Acoustic Curtains
While standard curtains offer little sound protection, heavy triple-weave acoustic blackout drapes or curtains lined with a interior layer of Mass-Loaded Vinyl (MLV) absorb mid-frequency sound reflection and muffle ambient street noise. Ensure curtains overlap the window frame by at least 3 inches on all sides.
Step 4: Upgrade Walls with Mass and Damping
If sound leaks through shared interior walls or exterior party walls, you must increase structural mass and apply viscoelastic damping.
1. Fill Hollow Wall Cavities with Rockwool Insulation
If you are opening up drywall for a renovation:
- Remove standard pink fiberglass insulation.
- Pack wall stud cavities tightly with dense mineral wool/rockwool insulation batts (such as Rockwool Safe ‘n’ Sound). Mineral wool is much denser than fiberglass and absorbs low-frequency sound energy effectively.
2. The Green Glue & Second Drywall Layer Technique (No Demo Required)
If you cannot remove existing drywall, add mass directly over the top:
- Apply a generous, wavy pattern of Green Glue Damping Compound onto the back of a new sheet of 5/8-inch Type X fire-rated drywall using a caulk gun (use 2 tubes per 4×8 ft sheet).
- Screw the new drywall layer directly over your existing drywall wall, staggering all seams so joints do not align.
- The viscoelastic Green Glue layer remains flexible forever, shearing when sound waves hit it and converting acoustic energy into thermal heat energy.
- Seal all outer perimeter seams with non-hardening acoustic caulk.
Step 5: Soundproof Floors and Ceilings (Stopping Footsteps and Bass)
Impact noise from upstairs footsteps or lower floor subwoofers requires structural decoupling or heavy floor underlayment.
1. Soundproofing Floors
- Mass-Loaded Vinyl (MLV): Roll out a 1/8-inch layer of high-density Mass-Loaded Vinyl (1 lb per sq ft) directly over subflooring.
- Acoustic Underlayment: Install dense rubber or cork floor underlayment beneath hardwood, laminate, or tile flooring.
- Thick Carpet & High-Density Foam Padding: For an immediate non-construction fix, lay thick plush area rugs backed by a 1/2-inch dense memory foam carpet pad to cushion footfall impacts.
2. Soundproofing Ceilings
- Resilient Channels / Sound Isolation Clips: When constructing a ceiling, attach metal resilient channels (RC-1) perpendicular to floor joists before hanging drywall. This mechanically decouples the ceiling drywall from the floor above, preventing footsteps from transferring downwards.
Step 6: Internal Acoustic Treatment (Improving Room Sound Quality)
Once you have sealed and isolated the room to block external sound, treat the internal room surfaces to prevent flutter echo and boxy reverberation.
- Place Acoustic Panels at Reflection Points: Mount high-density fiberglass or rockwool acoustic panels at eye/ear level on side walls to absorb primary sound reflections.
- Install Bass Traps in Room Corners: Low-frequency bass rumble naturally gathers in 90-degree room corners. Place thick triangular corner bass traps floor-to-ceiling in corners to tame muddy low-end build-up.
Quick Reference Summary Checklist
- Seal all air gaps first around doors, windows, and electrical outlets using flexible acoustic caulk.
- Replace hollow doors with solid-core doors equipped with perimeter weatherstripping and sweeps.
- Add mass and damping using Green Glue sandwiched between two layers of 5/8-inch drywall.
- Insulate interior wall cavities with dense Rockwool mineral wool batts.
- Muffle footsteps on floors using high-density foam pads, MLV, or thick rugs.
Final Thoughts
Soundproofing a room successfully requires selecting the right strategy for the specific type of noise you want to control. By starting with air-leak sealing, adding dense structural mass, using viscoelastic damping compounds, and isolating vibrations, you can transform any loud, noisy room into a quiet, peaceful space for work, sleep, or creative recording.
