

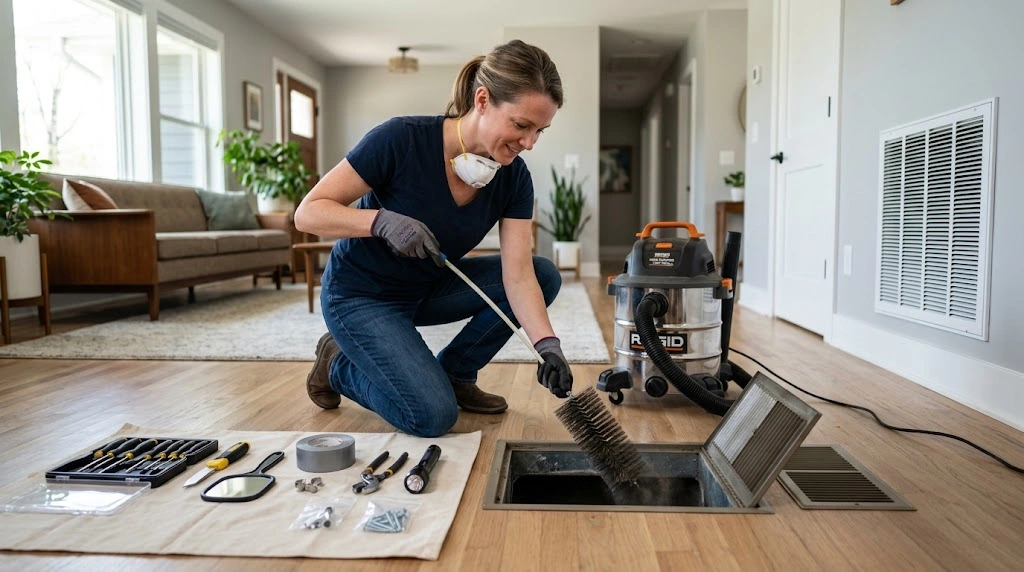
Your home’s Heating, Ventilation, and Air Conditioning (HVAC) system is responsible for circulating air throughout every room, maintaining comfortable indoor temperatures, and regulating humidity. However, over months and years of continuous operation, your home’s air duct network accumulates significant amounts of household dust, pet dander, pollen, mold spores, construction debris, and dust mite allergens.
When air ducts become clogged with debris, your HVAC system must work significantly harder to push air through supply vents. This increased resistance strain forces the blower motor to draw more electricity—driving up monthly energy bills—while circulating dirty, allergy-triggering air into your living spaces.
In this exhaustive 2500+ word DIY master guide, you will learn how to identify signs of dirty air ducts, safely clean supply and return vents using accessible DIY tools, deep-clean blower fan components, replace air filters effectively, prevent mold growth inside ductwork, and establish a long-term maintenance schedule to maximize system efficiency.
Step 1: Understand How Ductwork Contamination Affects Your Home
Before diving into cleaning procedures, it is essential to understand how air flows through your home and why duct maintenance is crucial.
1. The HVAC Air Cycle

- Return Ducts: Draw stale indoor air from rooms back toward your central air handler/furnace.
- Filtration Unit: Traps airborne particles before they reach sensitive mechanical components.
- Heating/Cooling Coils: Condition the filtered air to your desired thermostat temperature setting.
- Supply Ducts: Distribute conditioned air through ceiling and wall registers back into your living rooms and bedrooms.
2. Common Signs Your Air Ducts Need Cleaning
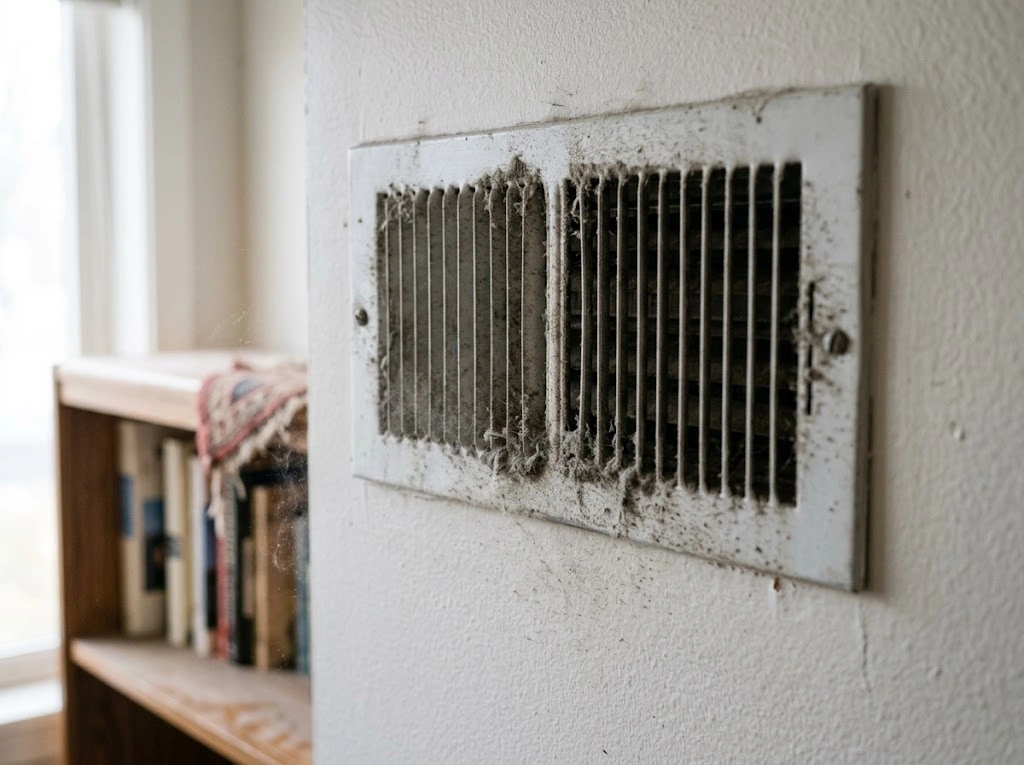
- Visible Dust Clouds: Puffs of dust blow out of supply registers whenever the heat or air conditioning kicks on.
- Uneven Airflow: Certain bedrooms feel significantly warmer or cooler than others due to duct blockages.
- Rapid Dust Accumulation: Furniture surfaces develop a thick layer of fine gray dust within 24 to 48 hours of cleaning.
- Musty Odors: A persistent stale or moldy smell circulates through vents when the furnace or air conditioner operates.
- Unexplained Allergy Symptoms: Family members experience frequent sneezing, coughing, itchy eyes, or morning sinus congestion while indoors.
Step 2: Essential DIY Duct Cleaning Tools and Prep Work
Professional duct cleaning services often use truck-mounted vacuum systems, but homeowners can achieve high-efficiency maintenance using standard household cleaning equipment.
Tool & Equipment Checklist:
- Heavy-Duty Vacuum: A Shop-Vac or household canister vacuum equipped with a long flexible hose and a HEPA filter bag.
- Rotary Duct Brush / Dryer Vent Line Cleaner: A flexible 10-to-20-foot brush attachment that attaches to a cordless power drill.
- Stiff-Bristled Hand Brush & Microfiber Cloths
- Cordless Drill & Nut Driver Bits: For removing vent register screws.
- Painter’s Tape & Microfiber Towels: For sealing vent openings during suction cleaning.
- Personal Protective Equipment (PPE): N95 dust mask, eye protection goggles, and work gloves.
- High-MERV Furnace Filters: Replacement pleated air filters matching your unit’s exact dimensions.
Step 3: Step-by-Step DIY Air Duct Cleaning Process
To prevent dust from circulating into clean rooms during maintenance, follow a systematic room-by-room procedure.
1. Turn Off the HVAC System
Safety first: Turn off your thermostat and shut down power to your furnace/air handler at the main electrical breaker panel before opening any vents or accessing mechanical components.
2. Cover Supply Vent Registers
Unscrew supply vent covers in each room. Cover each opening with a damp microfiber towel or seal it with painter’s tape—leaving only the single register you are currently cleaning open. Sealing unused vents concentrates maximum vacuum suction on the active line.
3. Agitate Debris with a Duct Brush
Attach a flexible rotary duct brush to a cordless drill. Feed the brush head 6 to 10 feet deep into the open register pipe. Run the drill on medium speed while moving the rod back and forth to scrub caked-on dust loose from metal duct walls.
4. Vacuum the Duct Interior
Insert your Shop-Vac hose equipped with a brush nozzle deep into the duct cavity. Vacuum up all loose dust, pet hair, and drywall debris dislodged by the agitation brush.
5. Wash Vent Register Covers
Immerse metal and plastic floor register grilles in a sink filled with warm water and dish soap. Scrub away grease and lint with a stiff nylon brush, dry completely with a microfiber towel, and reinstall.
Step 4: Clean the Central Air Handler and Blower Motor
Cleaning your room vents addresses only half the equation—dust also accumulates around the central furnace unit.
- Clean the Blower Fan Assembly: Remove the lower access panel on your indoor air handler unit. Use a soft brush and vacuum hose to gently clean dust off the blower wheel blades. Avoid bumping or loosening balance clips attached to fan blades.
- Inspect the Evaporator Coil: Dust buildup on indoor A/C evaporator coils blocks heat transfer and breeds mold. Spray the coil fins with an no-rinse foaming evaporator coil cleaner. The foam breaks down grime and drips naturally into the condensate drain pan.
- Clear the Condensate Drain Line: Pour 1 cup of distilled white vinegar down the PVC condensate drain pipe to dissolve algae, slime, and fungal buildup that can cause water overflow leaks.
Step 5: Upgrade Filter Selection and Maintenance Schedules
Air filters serve as your HVAC system’s primary defense against dust buildup. Choosing the correct filter protects system performance and indoor air quality.
1. Understanding MERV Ratings (Minimum Efficiency Reporting Value)
- MERV 1 to 4: Basic fiberglass filters. Stops large lint but allows fine dust and allergens to pass right through into ductwork.
- MERV 8 to 11 (Recommended): High-efficiency pleated synthetic filters. Captures dust mites, pet dander, mold spores, and fine dust without restricting air circulation in residential systems.
- MERV 13+: Ultra-dense filters used in hospitals. Caution: High-MERV filters can severely restrict airflow in standard home systems, causing compressor burnout if not designed for low static pressure.
2. Filter Replacement Schedule
- Standard Homes: Replace pleated air filters every 90 days.
- Homes with Pets: Replace filters every 60 days.
- Occupants with Severe Allergies: Replace filters every 30 to 45 days.
Step 6: Preventative Duct Care and Mold Prevention
Taking proactive preventative measures eliminates the need for deep duct cleaning for years at a time.
- Maintain Indoor Humidity Below 50%: Use dehumidifiers in basements during humid summer months to prevent moisture condensation inside cold air ducts, which creates ideal conditions for toxic black mold growth.
- Seal Duct Joint Leaks: Inspect exposed ductwork in basements and attics. Seal open metal joints using metalized foil tape or painted-on mastic duct sealant. Never use standard cloth duct tape, which dries out, degrades, and peels off over time!
- Run the Blower Fan Continuous Mode: Set your thermostat fan switch to “ON” rather than “AUTO” to keep air passing continuously through your MERV-rated filter, trapping airborne dust before it settles onto floor registers.
Quick Reference Summary Checklist
- Shut off system power at the thermostat and breaker box before cleaning.
- Seal unused room vents with painter’s tape to concentrate vacuum suction.
- Scrub duct walls using a flexible rotary brush attachment on a cordless drill.
- Clean indoor A/C evaporator coils using a no-rinse foaming coil spray.
- Pour white vinegar down PVC drain lines to prevent condensate clogs and mold.
- Use MERV 8 to 11 pleated filters and change them every 60 to 90 days.
- Seal metal duct joints with mastic sealant or foil tape—not regular duct tape.
Final Thoughts
Maintaining clean HVAC air ducts is essential for preserving high indoor air quality, reducing household dust, and ensuring your heating and cooling equipment runs at peak efficiency. By systematically agitating and vacuuming ductwork, cleaning central blower components, using high-quality air filters, and sealing duct joints, you can enjoy clean, fresh air while extending the lifespan of your HVAC system.
