

What Is a Home Energy Audit?
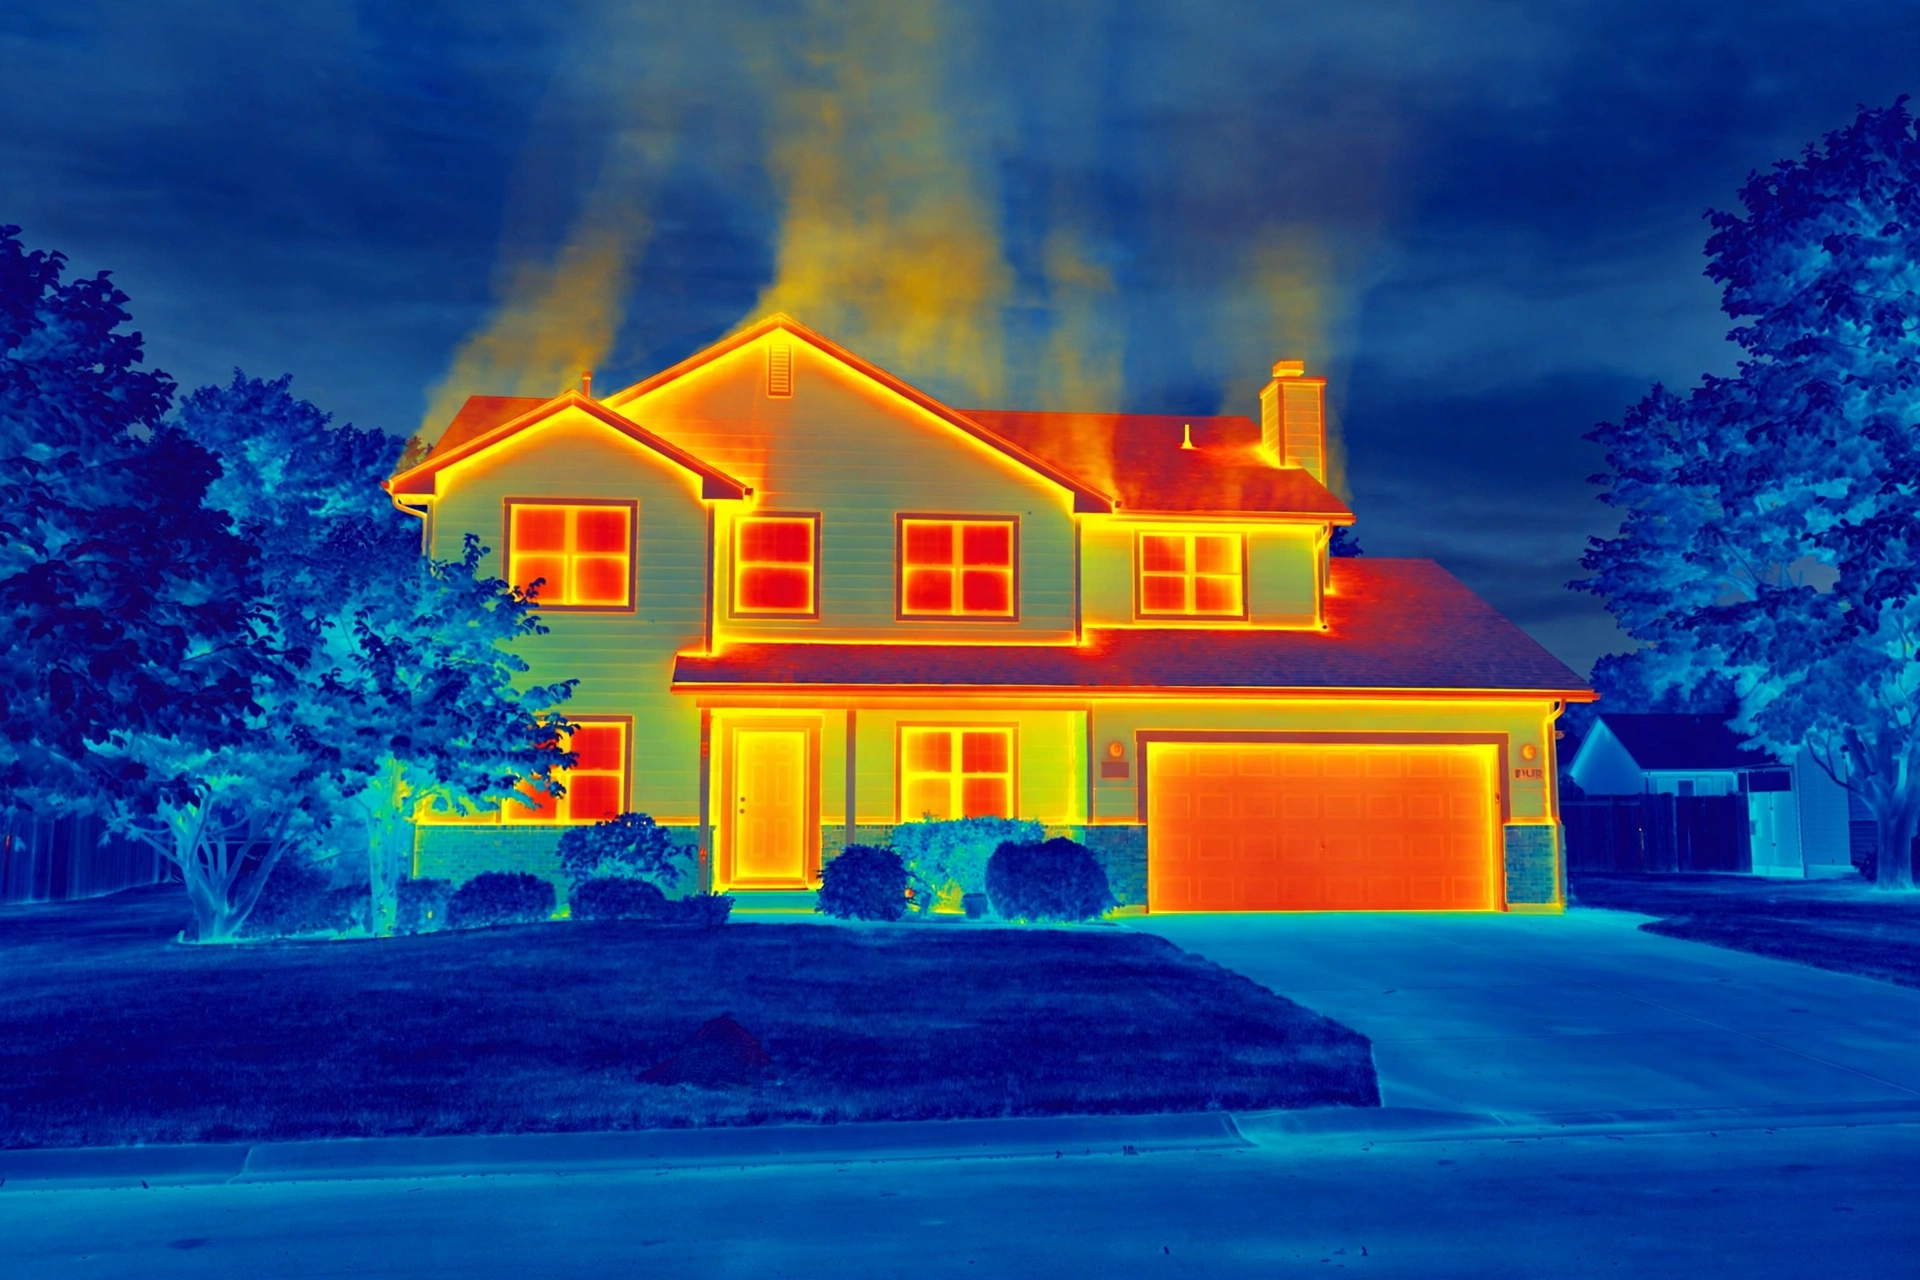
A home energy audit is a systematic inspection of your house to find where energy — and money — is being wasted. A professional auditor uses tools like a blower door (which depressurizes your house to reveal air leaks) and infrared cameras (which show missing insulation as cold spots). A professional audit typically costs $200–$500, and many utility companies subsidize or fully cover it, so check with yours first.
But you can catch the biggest problems yourself with a careful DIY walkthrough. The fixes below are ordered by return on investment, so even doing just the first two can cut a meaningful chunk off your bills.
Step 1: Hunt Down Air Leaks
Air leakage is the single biggest source of wasted energy in most homes — warm air escaping in winter, hot air infiltrating in summer. The usual suspects:
- Attic hatch and pull-down stairs — often completely unsealed and uninsulated.
- Recessed ceiling lights — older can lights leak air straight into the attic.
- Electrical outlets and switches on exterior walls — remove the cover plate and you’ll often feel a draft.
- Windows and doors — check weatherstripping for cracks and compression.
- Where plumbing, wiring, and ducts pass through walls and floors — these penetrations are rarely sealed.
- Basement rim joists — the perimeter where the house framing meets the foundation.
How to find them: on a windy day, turn off your furnace and hold a lit incense stick near suspected spots — the smoke will waver or blow sideways where air is moving. For a bigger-picture view, inexpensive thermal camera attachments for phones ($200–$300) make cold spots glow on screen.
How to fix them: caulk for stationary cracks, weatherstripping for moving parts (doors, operable windows), and expanding foam for larger gaps around penetrations. A few tubes of caulk and a Saturday afternoon is the highest-ROI energy project in existence.
Step 2: Check Your Insulation
Start in the attic — it’s the easiest place to inspect and the most important. Insulation is rated by R-value (resistance to heat flow); most climates need attic insulation around R-38 to R-60, which translates to roughly 10–17 inches of fiberglass batts or blown cellulose.
Look for: insulation that’s compressed, water-stained, missing in spots, or pulled away from the eaves. Pay special attention to the area above exterior walls (the “top plate”), which builders often skip. If you can see your ceiling joists poking through, you don’t have enough.
Don’t forget floors over unheated spaces (garages, crawl spaces) and basement walls — insulating these is less glamorous but very effective.
Step 3: Evaluate Heating and Cooling Equipment
If your furnace or AC is more than 15 years old, it’s a candidate for replacement — modern high-efficiency units use dramatically less energy. Short of replacement:
- Replace filters every 1–3 months; a clogged filter forces the system to work harder.
- Have ducts inspected — leaky ducts can waste 25–30% of heated or cooled air into attics and crawl spaces. Sealing them with mastic (not duct tape, which fails) is one of the best investments you can make.
- Install a programmable or smart thermostat and actually program it: 7–10°F setback for 8 hours a day can save around 10% a year on heating and cooling.
Step 4: Lighting, Appliances, and Phantom Loads
Swap any remaining incandescent or CFL bulbs for LEDs — they use about 75% less energy and last far longer. Then walk through with fresh eyes: cable boxes, game consoles, and older TVs draw power even when “off.” Smart power strips that cut standby power to peripherals pay for themselves within a year.
When appliances die, replace them with ENERGY STAR models — and check the yellow EnergyGuide label, not just the star, since efficiency varies within the label.
Step 5: Windows — Repair Before You Replace
Full window replacement is expensive and slow to pay back. Before you spend thousands, try: re-caulking exterior trim, adding or replacing weatherstripping, installing interior storm window panels, and using cellular shades. These capture most of the benefit at a fraction of the cost. Reserve full replacement for windows that are rotted, fogged between panes, or single-pane in a harsh climate.
Prioritizing: The Biggest Bang for Your Buck
If you do nothing else, do these four in order:
- Air-seal the attic floor and top plates — cheap, fast, huge impact.
- Bring attic insulation up to R-38 or better.
- Seal leaky ducts with mastic.
- Install and program a smart thermostat.
Together these typically cost well under $2,000 DIY (less with utility rebates) and can cut heating and cooling bills by 15–30%.
When to Call a Professional
Bring in a certified auditor (look for BPI or RESNET certification) if your bills are inexplicably high after DIY fixes, if you suspect major insulation voids inside walls, or before a big investment like new HVAC or windows. The blower-door number they give you — air changes per hour — becomes your baseline to measure improvement against.
The Bottom Line
A home energy audit isn’t about buying the newest gadget — it’s about finding the holes, literally and figuratively, in your house. Seal the leaks, beef up the insulation, and tune what you already own. Your wallet (and your comfort on the coldest night of the year) will thank you.
