

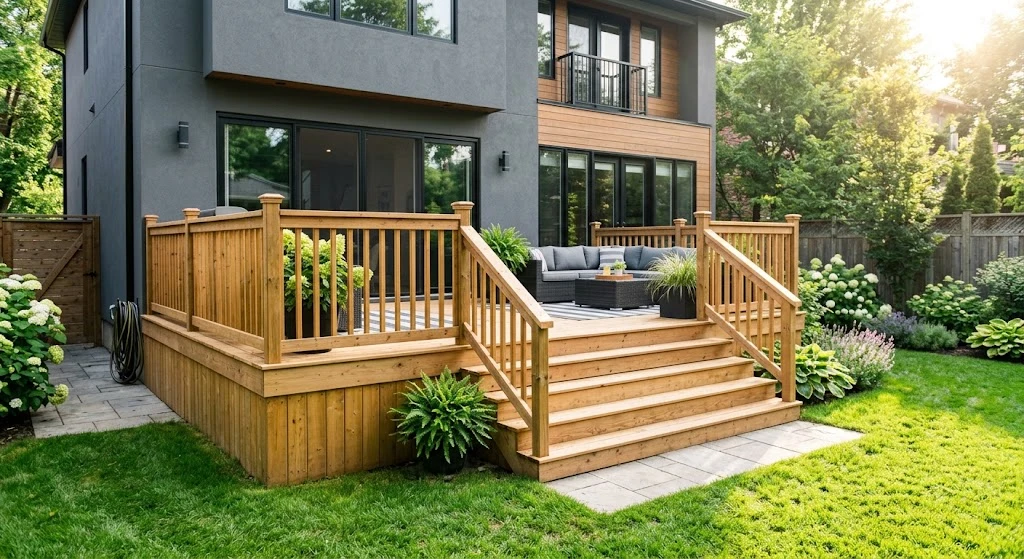
Adding a custom wooden deck to your home is one of the most rewarding home improvement projects you can undertake. A well-designed outdoor deck extends your living space into the backyard, creates an inviting area for summer barbecues, adds significant functional square footage, and delivers an average return on investment (ROI) of 65% to 75% upon home resale.
While hiring a professional deck-building contractor can cost upwards of $8,000 to $15,000 for a standard attached deck, building a deck yourself as a DIY project cuts those costs by more than half. With basic carpentry tools, proper spatial planning, precise measurements, and adherence to local structural building codes, you can craft a rock-solid, code-compliant outdoor deck that lasts for decades.
In this exhaustive DIY master guide, you will learn how to design a structural deck layout, obtain necessary permits, dig and pour concrete footings, install ledger boards, construct a pressure-treated joist framework, lay deck boards with proper spacing, and seal your deck against weather decay.
Step 1: Planning, Building Codes, and Permits
Before buying lumber or digging post holes, you must ensure your deck design complies with local building safety regulations and structural load limits.
1. Check Local Building Codes and HOA Rules
- Permit Requirements: Most local municipalities require a building permit for attached decks or floating decks taller than 30 inches above grade.
- Frost Line Depth: Concrete footings must extend below your local climate’s frost depth line (typically 36 to 48 inches deep in cold regions) to prevent frost heaving from lifting and warping your deck frame during winter.
- Setback Limits: Verify property line setback requirements with your local planning department to ensure your deck sits at a legal distance from property boundaries.
2. Choose the Right Decking Material
- Pressure-Treated Pine (PTP): The most popular and economical choice. Treated with copper preservatives to resist rot and insect damage, lasting 15 to 20 years with regular staining.
- Cedar or Redwood: Naturally rot-resistant, highly stable, and beautiful natural wood grain. Costs more than pressure-treated pine but requires less chemical treatment.
- Composite Decking (e.g., Trex): Manufactured from recycled wood fibers and plastic polymers. Highly durable, virtually maintenance-free, and rot-proof, though material costs are 2x to 3x higher than pressure-treated wood.
Step 2: Essential Tools and Materials
Gather these carpentry and masonry tools before starting construction:
- Lumber: Pressure-treated 2×8 or 2×10 joists, 4×4 or 6×6 support posts, 2×2 balusters, and 5/4×6 decking boards.
- Hardware: 1/2-inch structural ledger lag bolts, joist hangers, hurricane ties, stainless steel 3-inch deck screws, and 1/2-inch anchor bolts.
- Concrete & Footing Tubes: Sonotube cardboard footing forms and quick-setting concrete bags.
- Tools: Circular saw, miter saw, cordless drill/impact driver, post-hole digger, chalk line, 4-foot spirit level, speed square, string line, and safety goggles.
Step 3: Install the Ledger Board (For Attached Decks)
The ledger board attaches the deck directly to your house’s rim joist. Over 80% of structural deck failures occur due to improperly attached or unflashed ledger boards!
Step-by-Step Ledger Installation:
- Remove House Siding: Cut away exterior vinyl or wood siding to expose the house rim joist where the ledger board will sit.
- Apply Metal Flashing: Install Z-flashing or self-adhesive waterproofing membrane over the exposed house band to prevent rainwater from seeping into wall framing.
- Mount the Ledger Board: Position a 2×10 pressure-treated board flat against the house. Secure it using two 1/2-inch structural lag screws or LEDGERLOK fasteners staggered every 16 inches. Never use nails to mount a ledger board!
Step 4: Layout and Pour Concrete Footings
Concrete footings distribute the deck’s structural weight into the soil, keeping the posts stable.
- Batter Boards and String Lines: Set up temporary wooden batter boards beyond the deck perimeter. Stretch tight mason string lines perpendicular to the ledger board using the 3-4-5 Pythagorean theorem rule to ensure precise 90-degree square corners.
- Dig Footing Holes: Mark post locations along the string line. Use a post-hole digger or power auger to dig holes below your local frost line depth.
- Set Sonotube Forms: Insert cardboard Sonotubes into the holes, leveling their tops 2 inches above ground level.
- Pour Concrete: Mix quick-setting concrete, fill the tubes, tamp out trapped air bubbles, and insert a 1/2-inch galvanized J-bolt anchor into the wet center of each footing. Let cure for 24 to 48 hours.
Step 5: Erect Support Posts and Beams
Support beams sit atop vertical posts to hold up the structural floor joists.
- Attach Post Anchors: Secure metal post bases onto the cured concrete J-bolts using washers and nuts.
- Mount Support Posts: Set 6×6 pressure-treated posts vertically into the post anchors. Plumb each post with a level and temporarily brace them with scrap 2x4s.
- Notch and Install Beams: Cut posts to uniform height. Notch the top of 6×6 posts to cradle a doubled 2×10 beam, then bolt the beam to the post using 1/2-inch carriage bolts.
Step 6: Construct the Floor Joist Frame
Floor joists run perpendicular to the ledger board to support the weight of the decking boards.
- Mark Joist Spacing: Mark joist centers along the ledger board and outer beam every 16 inches on-center (or 12 inches on-center if installing diagonal decking).
- Attach Joist Hangers: Screw galvanized metal joist hangers along the ledger board at your 16-inch marks using structural connector nails/screws.
- Install Floor Joists: Drop pre-cut 2×8 or 2×10 joists into the hangers, securing them with joist hanger nails. Secure joists to the support beam using metal hurricane ties for uplift protection.
- Rim Joists: Screw outer rim joists across the exposed end caps of the floor joists to square and lock the entire frame in place.
Step 7: Lay Decking Boards
Laying the surface decking boards is where your deck visually comes to life.
- Start from the Outside: Begin installing 5/4×6 decking boards at the outer edge of the deck, working inwards toward the house wall.
- Board Spacing: Pressure-treated lumber is often wet when purchased and shrinks as it dries. Leave a 1/8-inch gap (about the width of a 16d nail) between wet boards to allow rainwater drainage and expansion space.
- Secure Decking: Drive two 3-inch exterior deck screws into every joist intersection. Countersink screw heads slightly beneath the wood surface.
- Trim Overhanging Ends: Allow deck boards to overhang outer edges by a few inches during installation. Once all boards are screwed down, snap a straight chalk line along the outer edge and cut all overhangs flush in a single pass with a circular saw.
Step 8: Build Stairs and Guardrails
If your deck floor rests more than 30 inches above ground level, building code requires safety guardrails and sturdy stairs.
- Guardrail Posts: Attach 4×4 posts to the inside of outer rim joists using 1/2-inch carriage bolts. Posts must stand at least 36 inches above the finished deck floor.
- Baluster Spacing: Install vertical 2×2 balusters between top and bottom handrails. Code Rule: The gap between balusters must be less than 4 inches so a 4-inch sphere cannot pass through.
- Stair Stringers: Cut 2×12 stair stringers using a framing square to achieve standard 7-inch risers and 11-inch tread depths. Mount stringers with heavy-duty stair hangers and secure decking treads.
Quick Reference Summary Checklist
- Secure necessary building permits and dig footings below your local frost depth line.
- Mount ledger boards with 1/2-inch structural lag screws and metal flashing—never nails.
- Set floor joists 16 inches on-center using galvanized joist hangers.
- Space wet pressure-treated decking boards 1/8-inch apart for expansion and drainage.
- Maintain baluster gaps under 4 inches on guardrails for code compliance.
Final Thoughts
Building a DIY outdoor deck is a significant project, but by breaking it down into systematic phases—from ledger attachment and concrete footings to joist framing and decking installation—you can create a safe, structurally sound, and stunning outdoor living space. Proper craftsmanship now ensures your deck stays safe and beautiful for decades of family enjoyment.
