

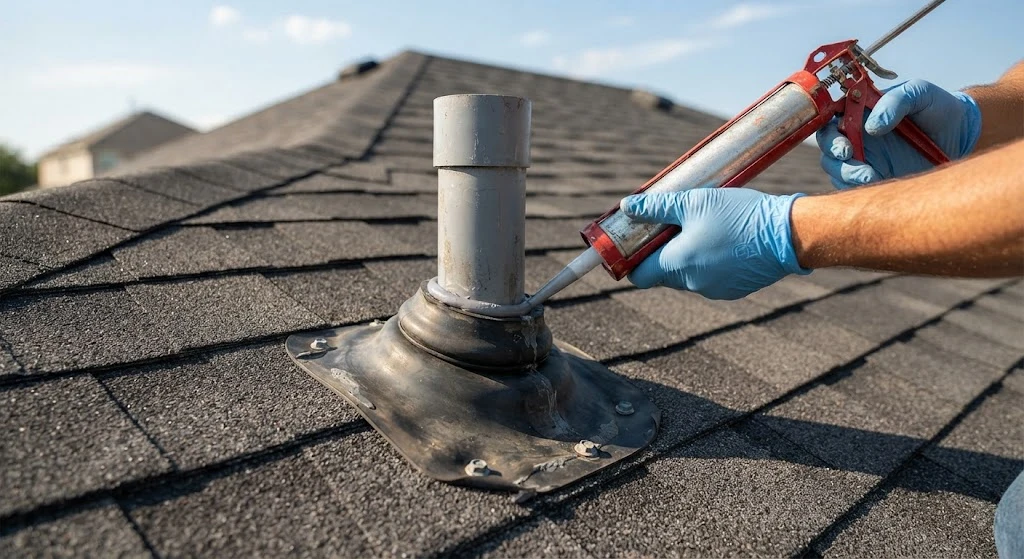
Skill Level: Beginner-friendly (1 out of 5) Estimated Cost: $10–$25 Time Needed: 20–40 minutes Hardest Part: Getting safely up on the roof
A leaking roof vent pipe might seem like a small problem, but ignore it for too long and it can turn into a costly one. Water that sneaks in around a cracked vent boot can soak your attic insulation, stain your ceilings, and even lead to mold or rot in your roof decking. The good news? Most homeowners can fix this issue themselves in under an hour, using inexpensive tools you can find at any hardware store.
This guide walks you through everything you need to know: what causes vent pipe leaks, how to spot them early, and the exact steps to seal them for good. We’ll also cover long-term maintenance tips so you don’t have to deal with this problem again anytime soon.
What Is a Roof Vent Pipe, and Why Does It Leak?
Every home’s plumbing system needs a way to release sewer gases and let air into the drain lines so wastewater can flow smoothly. That’s the job of the roof vent pipe (sometimes called a plumbing stack). It sticks up through your roof and is sealed at the base with a rubber boot or flashing to keep rainwater out.
Because this rubber boot sits exposed to sun, rain, snow, and temperature swings all year long, it’s one of the first roofing components to wear out — often years before the shingles around it need replacing.
Common Causes of a Leaking Vent Pipe
Several factors can cause the seal around your vent pipe to fail:
- UV damage: Constant sun exposure dries out and cracks the rubber boot over time.
- Old or worn flashing: Flashing that’s corroded, bent, or improperly seated allows water to seep through.
- Cheap materials or poor installation: Low-quality boots or a rushed installation job often fail early.
- Weather and debris damage: Hail, falling branches, or heavy storms can crack or dislodge the pipe collar.
- Temperature swings: Repeated freeze-thaw cycles cause the rubber to stiffen, shrink, and eventually split.
- Sharp pipe edges: If a roofer slides the rubber boot over a pipe with a rough or sharp edge during installation, it can nick the rubber immediately — creating a hidden leak point from day one. A quick pass with a knife to smooth the pipe’s edge before installation prevents this entirely.
Knowing the cause helps you decide whether a simple re-caulking will do the trick, or whether you need a full boot replacement.
Warning Signs You Have a Leak
Catching a vent pipe leak early can save you thousands in repair costs. Watch for these red flags:
- Water stains or discoloration on ceilings or walls near the vent pipe’s location
- A musty or mildew smell in upstairs rooms
- Damp, matted, or moldy insulation in the attic
- Dripping or trickling sounds from the attic during rain
- Visible cracks, gaps, or curling at the base of the boot when viewed from a ladder or with binoculars
If you notice any of these signs, it’s worth inspecting the roof as soon as weather permits.
What You’ll Need Before You Start
Gather these tools and materials ahead of time so you’re not making extra trips up and down the ladder:
Tools:
- Sturdy extension ladder
- Safety harness (especially for steep roofs)
- Work gloves
- Safety glasses
- Wire brush
- Utility knife or pocket knife
- Caulk gun
Materials:
- Lap-seal (roofing) caulk
- Replacement rubber boot or gasket (if the old one is cracked beyond repair)
Most of these items cost under $25 total, and a tube of quality roofing caulk or a replacement boot typically runs $8–$15.
Roof Safety Comes First
Before you climb up, remember: falls are one of the leading causes of injury in home repair work. Roofing professionals often point out that a significant share of construction-related injuries happen specifically because someone lost their footing on a roof. Don’t take shortcuts here.
Follow these precautions every time you work on your roof:
- Choose a dry, calm day with little to no wind
- Wear shoes with good rubber traction, not smooth-soled sneakers
- Set your ladder on firm, level ground and secure it before climbing
- Use a safety harness anchored to your roof’s ridge, especially on steep slopes
- Have someone else nearby in case you need help
- Never rush — take your time getting your footing on each step
If your roof has a steep pitch, is more than one story, or you simply don’t feel confident up there, it’s smarter (and cheaper in the long run) to hire a licensed roofer.
Step-by-Step: How to Fix a Leaking Vent Pipe
Once you’re set up safely, follow these six steps to seal the leak.
Step 1: Clean the Area Around the Pipe
Use your wire brush to scrub away dirt, moss, granules, and any old, cracked caulk from around the base of the pipe and the surrounding flashing. A clean surface is essential — caulk won’t bond properly to a dirty or dusty area, and skipping this step is one of the most common reasons DIY repairs fail early.
Step 2: Inspect for Damage
Take a close look at the rubber boot, the metal flashing underneath it, and the shingles around the pipe. Small cracks or minor wear can usually be sealed with fresh caulk. But if the rubber boot is brittle, torn, or pulling away from the pipe, it’s best to replace the whole boot rather than just patching it.
Step 3: Smooth Any Rough Edges on the Pipe
Run your fingers carefully (with gloves on) along the top edge of the vent pipe. If you feel any burrs, sharp edges, or jagged plastic, use your utility knife to gently smooth them down. This step matters more than most people realize — a sharp edge can slice into a brand-new rubber boot the moment it’s installed, undoing all your work.
Step 4: Apply Fresh Caulk Around the Base
Load your caulk gun with lap-seal caulk and run a thick, continuous bead around the base of the pipe, right where it meets the flashing. For extra insurance, add a second bead just below the first. This creates a strong, flexible, waterproof barrier that will hold the new boot firmly in place.
Step 5: Install the Replacement Boot (If Needed)
If you’re replacing the boot, slide it down over the pipe until it sits flush and snug against the roof. Press firmly around the base so it beds into the fresh caulk underneath. Make sure it fully covers the old flashing and that there are no gaps or wrinkles where water could pool.
Step 6: Seal the Outer Edges
Finish by running one more bead of caulk around the outer edge of the boot, where it meets the shingles. This final seal locks out wind-driven rain and prevents water from working its way underneath the boot during heavy storms or snowmelt.
Let the caulk cure according to the manufacturer’s instructions (usually 24 hours) before heavy rain is expected, if possible.
How to Maintain Your Vent Pipes and Prevent Future Leaks
A little regular maintenance goes a long way toward avoiding repeat repairs.
Inspect twice a year. Walk your roofline or use binoculars from the ground each spring and fall. Look for cracking, curling, or gaps in the caulk and boot.
Clear away debris regularly. Leaves, pine needles, and moss trap moisture against the pipe and roofing material, speeding up deterioration. A soft brush or leaf blower works well for light cleaning — avoid pressure washers, which can damage shingles.
Refresh the caulk every 2–3 years. Even high-quality caulk breaks down under UV exposure over time. Reapplying it proactively is far cheaper than fixing water damage later.
Check after major storms. High winds, hail, and falling branches are common culprits behind sudden leaks, so it’s worth a quick visual check after any severe weather event.
When to Call a Roofing Professional
While this is a manageable DIY project for most homeowners, some situations call for expert help:
- The leak has caused visible damage to the roof decking or attic structure
- Multiple vent pipes are leaking at the same time
- You’ve already tried a DIY caulk fix and the leak keeps coming back
- The surrounding shingles are damaged or need replacing
- You’re not comfortable working at heights, especially on a steep or multi-story roof
A licensed roofer can also spot underlying issues — like poor original installation or ventilation problems — that a simple caulk job won’t fix.
Final Thoughts
A leaking roof vent pipe is one of the most common — and most fixable — roofing issues homeowners face. With about $20 in materials, an hour of your time, and a bit of caution on the ladder, you can stop the leak before it turns into a bigger, more expensive repair. Just remember: safety first, clean surfaces always, and when in doubt about the extent of the damage, don’t hesitate to bring in a professional.
Staying on top of small maintenance tasks like this is one of the easiest ways to protect your home’s value and avoid costly water damage down the road.
