

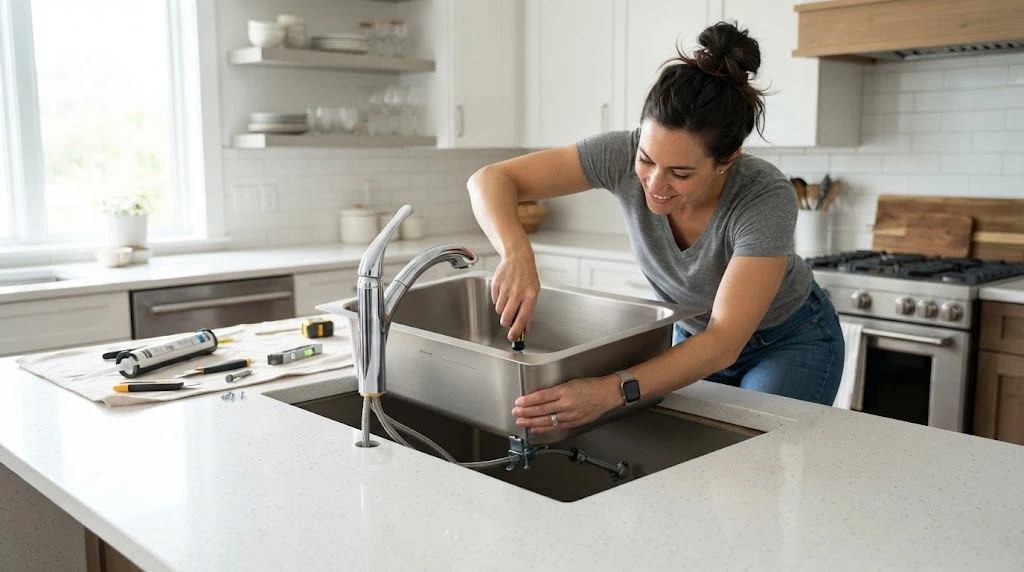
To install a kitchen sink, measure and cut the countertop opening, install the faucet and drain assembly, apply silicone sealant, lower the sink into place, secure the mounting clips, connect the water supply and drain pipes, then test the system for leaks. Most DIY installations take 4–6 hours.
Installing a new kitchen sink is one of the best ways to improve your kitchen’s appearance and functionality. Whether you’re replacing an old sink or installing one during a kitchen remodel, this project can save you money if done correctly. While it may seem challenging at first, most homeowners with basic DIY skills can complete the job by following the right steps.
This guide explains everything you need to know, from choosing the right sink and preparing your workspace to connecting the plumbing and testing for leaks. You’ll also learn common mistakes to avoid, safety tips, and maintenance advice to keep your new sink working properly for years.
Key Takeaways
| Feature | Details |
|---|---|
| Difficulty Level | Moderate |
| Time Required | 4–6 Hours |
| Estimated Cost | $250–$900 (DIY) |
| Professional Installation | $400–$1,500 |
| Best for Beginners | Drop-in sinks |
| Main Skills Needed | Measuring, cutting, basic plumbing |
| Safety Tip | Turn off the water supply before starting |
Why Install a New Kitchen Sink?
A kitchen sink is one of the busiest fixtures in your home. Over time, sinks become scratched, stained, or outdated. Replacing your old sink offers several benefits.
Benefits of Installing a New Sink
- Improves the look of your kitchen
- Increases home value
- Fixes leaks and drainage problems
- Provides more workspace
- Makes cleaning easier
- Allows installation of modern faucets and accessories
If your current sink has rust, cracks, or constant leaks, replacing it is often a better long-term solution than repairing it.
Types of Kitchen Sinks
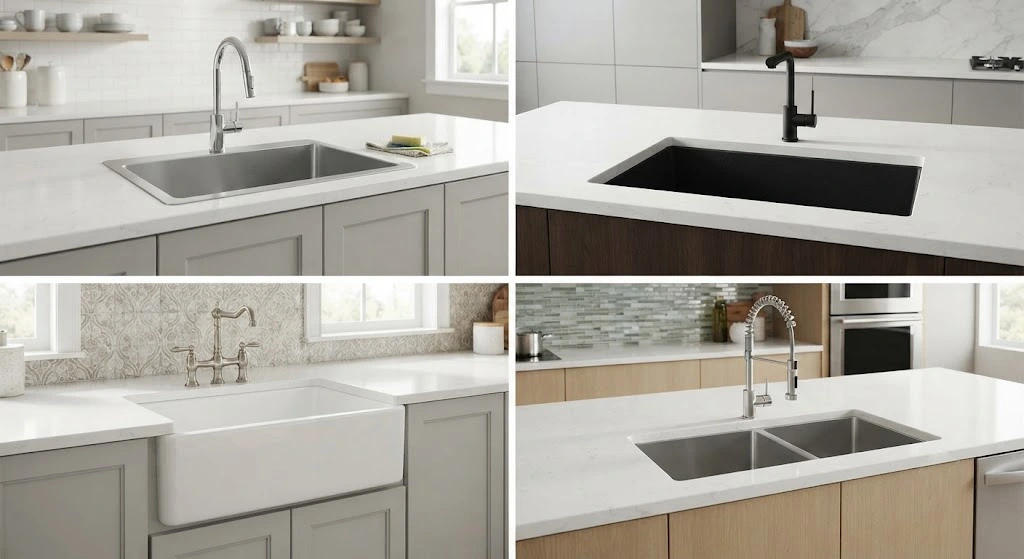
Choosing the right sink before installation is important because each type has different installation requirements.
| Sink Type | Best For | Installation Difficulty |
|---|---|---|
| Drop-In Sink | Most homes | Easy |
| Undermount Sink | Stone countertops | Moderate |
| Farmhouse Sink | Large kitchens | Difficult |
| Double Bowl Sink | Busy families | Moderate |
| Single Bowl Sink | Small kitchens | Easy |
For first-time DIY installers, a drop-in sink is usually the easiest option.
Tools You’ll Need
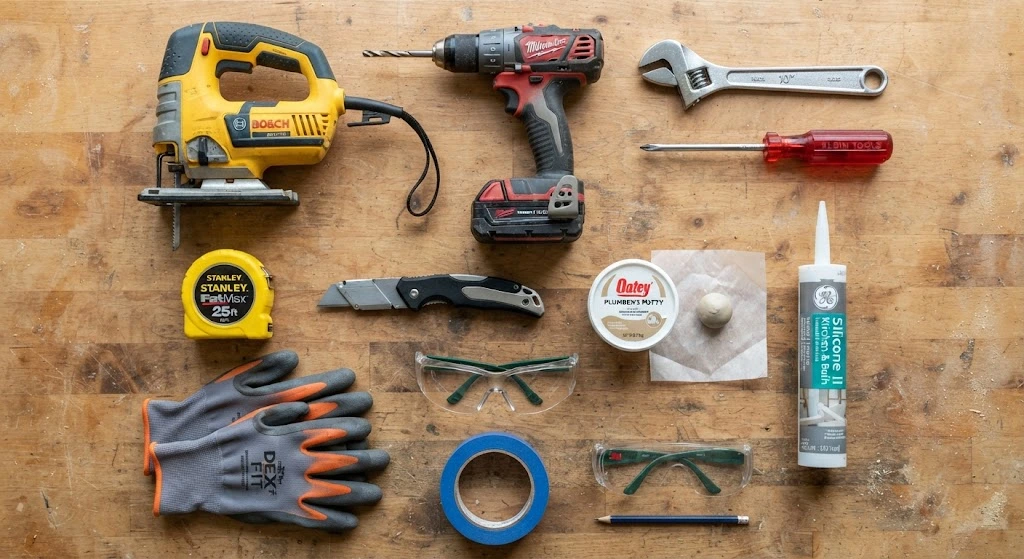
Gather all your tools before starting the project.
| Tool | Purpose |
|---|---|
| Tape Measure | Measure sink opening |
| Pencil or Marker | Mark cut lines |
| Jigsaw | Cut countertop |
| Drill | Create starter holes |
| Hole Saw (if needed) | Faucet holes |
| Adjustable Wrench | Tighten fittings |
| Channel Lock Pliers | Drain assembly |
| Utility Knife | Trim sealant |
| Screwdriver | Mounting clips |
| Safety Glasses | Eye protection |
| Work Gloves | Hand protection |
Materials Required
| Material | Purpose |
|---|---|
| Kitchen Sink | Main fixture |
| Kitchen Faucet | Water supply |
| Sink Drain Assembly | Water drainage |
| Basket Strainer | Prevent debris |
| Silicone Caulk | Waterproof seal |
| Plumber’s Putty | Drain seal |
| PVC Drain Pipe | Waste line |
| P-Trap Kit | Prevent sewer gases |
| Flexible Water Supply Lines | Water connection |
| Mounting Clips | Secure sink |
Before You Begin
Preparation is one of the most important parts of a successful sink installation.
Before removing the old sink, inspect the plumbing underneath. Make sure the shut-off valves work properly and look for signs of leaks or damaged pipes. If the plumbing is old or corroded, replacing worn parts now can prevent future problems.
Clear everything from under the sink so you have enough space to work comfortably.
Safety Tips
Always follow these safety precautions before starting.
- Turn off both hot and cold water valves.
- Disconnect electrical power to the garbage disposal.
- Wear gloves while handling metal edges.
- Wear safety glasses when cutting countertops.
- Lift heavy sinks with another person.
- Keep children and pets away from the work area.
- Read the manufacturer’s installation instructions before beginning.
Step 1: Turn Off the Water Supply
Locate the hot and cold water shut-off valves under the sink.
Turn both valves clockwise until they stop.
Next, turn on the kitchen faucet to release any remaining water pressure.
Place a bucket underneath the plumbing connections before disconnecting the supply lines. This will catch any water left inside the pipes.
Step 2: Remove the Old Sink
If you’re replacing an existing sink, disconnect everything carefully.
Remove:
- Water supply lines
- Drain pipes
- Garbage disposal (if installed)
- Faucet connections
- Sink clips
Use a utility knife to cut through the old silicone seal around the sink.
Lift the sink straight up. If it sticks, gently work around the edges until the seal breaks.
Once removed, clean all old caulk, dirt, and adhesive from the countertop.
A clean surface helps the new silicone create a watertight seal.
Step 3: Measure the Countertop Opening
Accurate measurements are critical.
Measure:
- Length
- Width
- Corner radius
- Cabinet opening below
If your new sink includes a paper template, place it on the countertop and center it carefully.
Leave about 1½ inches between the back edge of the sink and the backsplash.
Use painter’s tape around the outline before marking the cut lines. This helps reduce chipping on laminate countertops.
Step 4: Cut the Countertop Opening
If you’re installing a sink into a new countertop, drill a starter hole inside each corner of the outline.
Insert the jigsaw blade into one of the holes and slowly cut along the marked lines.
Take your time. Cutting too quickly can damage laminate or cause uneven edges.
After removing the cutout, place the sink into the opening without sealant.
This is called a dry fit.
Check that:
- The sink fits evenly.
- The edges sit flat.
- The faucet has enough room behind the sink.
- Plumbing lines align correctly.
If needed, trim the opening slightly until the sink fits perfectly.
Step 5: Install the Faucet Before Setting the Sink
It’s much easier to install the faucet while the sink is still outside the countertop.
Place the sink upside down on a soft towel or cardboard to prevent scratches.
Follow these steps:
- Insert the faucet through the mounting holes.
- Place the rubber gasket under the faucet base.
- Install the mounting plate and nuts from underneath.
- Tighten the nuts with a basin wrench or adjustable wrench.
- Make sure the faucet faces the correct direction.
Tip: Do not overtighten the mounting nuts. Too much force can crack porcelain sinks or damage stainless steel mounting holes.
Step 6: Install the Basket Strainer and Drain Assembly
The drain assembly creates a watertight seal and directs wastewater into the drain pipes.
Install the Basket Strainer
- Roll plumber’s putty into a thin rope.
- Press it under the basket strainer flange.
- Insert the basket strainer into the sink drain hole.
- Install the rubber gasket underneath.
- Add the friction ring and locknut.
- Tighten the locknut evenly.
- Wipe away extra plumber’s putty.
If your sink manufacturer recommends silicone instead of plumber’s putty, follow those instructions.
Step 7: Apply Silicone Sealant
Before placing the sink into the countertop, apply a continuous bead of 100% kitchen-grade silicone around the underside of the sink rim.
The silicone creates a waterproof seal that prevents water from reaching the countertop.
Avoid gaps in the bead because even a small opening can allow water to seep underneath.
Step 8: Lower the Sink into Position
Carefully lower the sink into the countertop opening.
If the sink is heavy, ask another person to help.
Once the sink is in place:
- Center it carefully.
- Make sure all sides are even.
- Press firmly around the edges.
- Check that the sink sits flat.
Clean away excess silicone immediately using a damp cloth.
Step 9: Secure the Mounting Clips
Most drop-in sinks include mounting clips.
These clips hold the sink tightly against the countertop.
Tighten each clip gradually.
Work in a crisscross pattern rather than tightening one side completely.
This creates even pressure and prevents the sink from shifting.
Do not overtighten the clips.
Too much pressure can warp the sink or damage laminate countertops.
Step 10: Connect the Water Supply Lines
Attach the flexible supply lines to the faucet.
Then connect them to the shut-off valves.
Make sure:
- Hot water connects to the left side.
- Cold water connects to the right side.
Tighten each fitting with an adjustable wrench.
Avoid excessive force.
Flexible braided stainless-steel supply lines are generally more durable than plastic tubing and are a good choice for long-term reliability.
Step 11: Install the P-Trap and Drain Pipes
The P-trap prevents sewer gases from entering your home.
Assemble the drain components in this order:
- Sink tailpiece
- Trap adapter
- P-trap
- Drain arm
- Wall drain
Before tightening everything, dry-fit the entire assembly.
This allows you to check alignment.
If needed, cut PVC pipes using a tubing cutter or PVC cutter.
Remove rough edges before assembly.
Hand-tighten all slip nuts first.
Then give each connection about a quarter turn with pliers if necessary.
Overtightening can damage plastic fittings.
Step 12: Connect the Dishwasher Drain (Optional)
If you have a dishwasher, connect its drain hose to the dishwasher inlet on the garbage disposal or sink tailpiece.
Secure the hose using a hose clamp.
Create a high loop beneath the countertop.
This prevents dirty water from flowing back into the dishwasher.
If required by local plumbing codes, install an air gap instead of a high loop.
Step 13: Install the Garbage Disposal (Optional)
If you’re installing a garbage disposal:
- Install the mounting bracket.
- Lock the disposal into place.
- Connect the discharge tube.
- Plug it into a GFCI outlet.
- Connect the dishwasher hose if needed.
Always turn off electrical power before working on the disposal.
Step 14: Turn On the Water and Test for Leaks
Slowly open both shut-off valves.
Allow water to fill the faucet.
Run both hot and cold water for several minutes.
Inspect every connection carefully.
Check:
- Faucet supply lines
- Shut-off valves
- Basket strainer
- Drain joints
- P-trap
- Dishwasher connection
- Garbage disposal
Place dry paper towels beneath each connection.
Even a small drip becomes easy to spot.
Cost Breakdown
| Item | Average Cost |
|---|---|
| Kitchen Sink | $150–$600 |
| Kitchen Faucet | $80–$350 |
| Drain Kit | $20–$60 |
| Water Supply Lines | $15–$40 |
| Silicone Sealant | $8–$15 |
| Plumber’s Putty | $4–$10 |
| Mounting Hardware | Usually Included |
| Total DIY Cost | $250–$900 |
| Professional Installation | $400–$1,500 |
Common Kitchen Sink Installation Mistakes
Avoid these common problems during installation:
Measuring Incorrectly
Measure twice before cutting the countertop.
A cut that’s too large is difficult to fix.
Using Too Much Silicone
Too much sealant creates a messy installation and doesn’t improve waterproofing.
A continuous, even bead is enough.
Overtightening Fittings
Plastic drain parts crack easily.
Tighten only until snug.
Forgetting to Test for Leaks
Always inspect every connection before storing items under the sink.
Skipping the Dry Fit
Test-fitting helps catch alignment issues before sealant is applied.
Pro Installation Tips
- Assemble as many sink components as possible before placing the sink into the countertop.
- Use braided stainless-steel water supply lines for better durability.
- Keep a bucket nearby while disconnecting old plumbing.
- Label hot and cold supply lines if needed.
- Allow silicone to cure according to the manufacturer’s instructions before exposing it to heavy water use.
- Save extra mounting clips for future repairs.
DIY vs. Professional Installation
Many homeowners wonder whether they should install a kitchen sink themselves or hire a plumber. The answer depends on your experience, available tools, and the type of sink you’re installing.
DIY Installation
A do-it-yourself installation is a good choice if:
- You’re replacing an existing drop-in sink.
- The plumbing is already in good condition.
- You have basic plumbing and tool experience.
- No major countertop changes are required.
Professional Installation
Hiring a professional is often the better option if:
- You’re installing a farmhouse sink.
- You’re switching from a drop-in to an undermount sink.
- Plumbing lines need to be relocated.
- Countertops require cutting or modification.
- You’re installing new water lines or shut-off valves.
- You don’t feel comfortable working with plumbing.
Although professional installation costs more, it can help prevent expensive water damage caused by installation mistakes.
Kitchen Sink Maintenance Tips
A properly maintained sink can last for many years. Regular cleaning also helps prevent odors, stains, and plumbing problems.
Daily Maintenance
- Rinse the sink after each use.
- Wipe away standing water.
- Clean food particles from the drain.
Weekly Cleaning
Wash the sink with warm water and mild dish soap.
For stainless steel sinks, wipe in the direction of the grain to maintain the finish.
Monthly Maintenance
Check underneath the sink for:
- Water leaks
- Loose fittings
- Mold or mildew
- Rust around supply valves
Fixing small issues early prevents costly repairs later.
Troubleshooting Common Problems
Even after a successful installation, you may experience small issues. Here’s how to solve them.
| Problem | Possible Cause | Solution |
|---|---|---|
| Water leaking under sink | Loose drain fitting | Tighten the connection |
| Faucet drips | Loose supply line or faulty cartridge | Tighten or replace the cartridge |
| Slow drainage | Clogged P-trap | Remove and clean the trap |
| Bad odor | Food buildup | Clean the drain and disposal |
| Sink moves | Loose mounting clips | Retighten the clips |
| Low water pressure | Dirty faucet aerator | Remove and clean the aerator |
| Water backs up | Blocked drain pipe | Use a drain snake or call a plumber |
Safety Reminders
Always keep safety in mind while working.
- Shut off the water supply before disconnecting pipes.
- Turn off electricity before working on a garbage disposal.
- Wear gloves when handling sharp metal edges.
- Wear eye protection while cutting countertops.
- Lift heavy sinks with assistance.
- Keep tools organized to avoid accidents.
Taking a few extra safety precautions can prevent injuries and make the project much smoother.
When Should You Replace a Kitchen Sink?
Sometimes replacing the sink is better than repairing it.
Replace your sink if you notice:
- Rust that won’t come off
- Large cracks or chips
- Frequent leaks
- Deep stains
- Drain problems that continue after repairs
- An outdated design during a kitchen remodel
Installing a modern sink can improve both appearance and everyday convenience.
Frequently Asked Questions
Can I install a kitchen sink by myself?
Yes. Most homeowners with basic DIY skills can install a standard drop-in kitchen sink by following the correct steps and using the proper tools.
How long does it take to install a kitchen sink?
Most DIY installations take between 4 and 6 hours. More complex installations may take longer.
Do I need plumber’s putty?
Plumber’s putty is commonly used to seal basket strainers. However, some sink manufacturers recommend silicone sealant instead. Always follow the manufacturer’s instructions.
Can I reuse my old faucet?
Yes, if it’s still in good condition and fits the new sink. Replacing the faucet during sink installation is often easier and may improve performance.
Should I use silicone around the sink?
Yes. A continuous bead of kitchen-grade silicone creates a waterproof seal between the sink and countertop.
What’s the easiest kitchen sink to install?
A drop-in sink is usually the easiest option because it rests on the countertop and requires less support than undermount or farmhouse sinks.
Why is my sink leaking after installation?
Leaks are usually caused by loose fittings, an uneven silicone seal, or an improperly installed drain assembly. Check each connection carefully and tighten only as needed.
How long should silicone cure before using the sink?
Most silicone sealants need 24 hours to cure fully. Check the product label for the exact curing time.
Final Checklist Before Finishing
Before considering the job complete, make sure you have:
- ✔ Water supply turned back on
- ✔ Faucet working properly
- ✔ No leaks under the sink
- ✔ Drain flowing smoothly
- ✔ Mounting clips tightened evenly
- ✔ Silicone cleaned around the edges
- ✔ Garbage disposal tested (if installed)
- ✔ Dishwasher drain connected correctly (if applicable)
Conclusion
Installing a kitchen sink is a practical home improvement project that can refresh your kitchen and improve its functionality. With careful planning, the right tools, and attention to detail, many homeowners can complete the installation without professional help.
The key to success is taking accurate measurements, preparing the countertop correctly, installing the faucet and drain assembly before lowering the sink into place, and checking every plumbing connection for leaks. Regular maintenance after installation will help your new sink stay in excellent condition for years.
If your project involves major plumbing changes, custom countertops, or a heavy farmhouse sink, hiring a licensed plumber is the safest option. Otherwise, a well-planned DIY installation can save money while giving you the satisfaction of completing the project yourself.
