

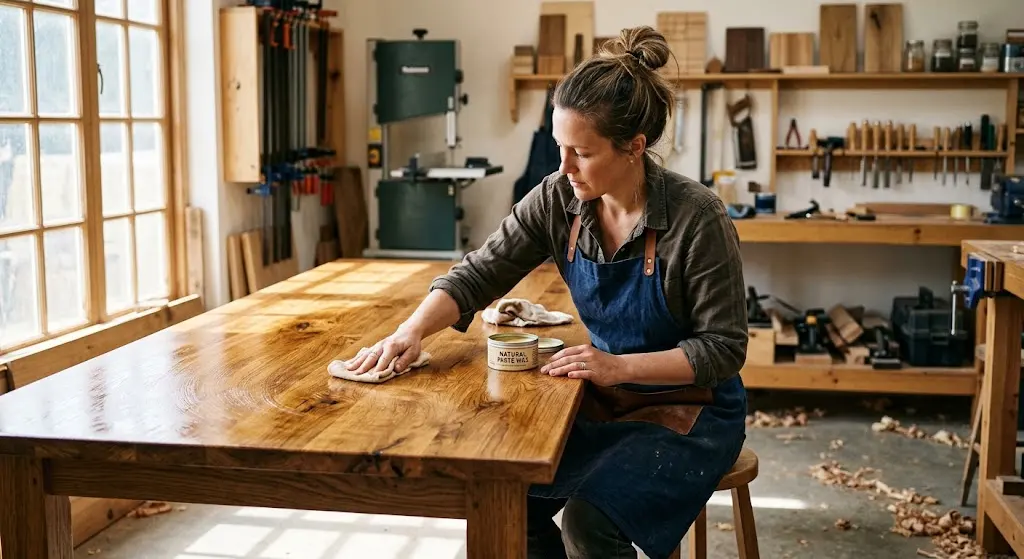
Wooden furniture adds timeless elegance, warmth, and character to any home. Whether it is a vintage oak dining table, a walnut coffee table, or mahogany bedroom dressers, solid wood and wood veneer pieces are built to last for generations. However, daily use, moisture exposure, pet claws, moving accidents, and sunlight can leave wood surfaces marred by ugly scratches, water ring stains, gouges, loose joints, and dull finishes.
Replacing damaged wooden furniture can be extremely expensive, but in most cases, expensive professional restoration is completely unnecessary. With the right techniques and basic DIY supplies, you can easily repair surface blemishes, fill deep cracks, stabilize wobbly chair legs, and restore the original lustrous shine of your furniture.
In this comprehensive DIY master guide, you will learn how to identify wood types and finishes, fix light scratches and deep gouges, eliminate stubborn white water rings, repair loose wooden joints, restore dried-out wood finishes, and establish a routine maintenance schedule to protect your wooden investment for years to come.
Step 1: Identify Wood Types, Finishes, and Surface Damage
Before applying any chemicals, oils, or sanding blocks to your furniture, it is essential to understand the material and the exact nature of the damage.
1. Hardwood vs. Softwood vs. Veneer
- Solid Hardwood (Oak, Maple, Walnut, Mahogany): Highly durable, heavy, and can tolerate deep sanding and complete refinishing.
- Softwood (Pine, Cedar, Fir): Softer density, easily dented, requires gentle filling and light sanding.
- Wood Veneer: A paper-thin sheet of natural wood glued over particle board or MDF. Warning: Heavy power sanding can quickly burn through veneer, permanently ruining the piece.
2. Identifying the Finish Type
- Polyurethane / Varnish: Creates a hard, plastic-like protective shell over the wood.
- Lacquer / Shellac: Dries quickly and dissolves easily when wiped with lacquer thinner or denatured alcohol.
- Oil / Wax Finishes (Tung Oil, Linseed Oil): Penetrates directly into wood fibers, leaving a natural matte texture rather than a heavy surface coating.
Step 2: Fixing Light Scratches, Dents, and Surface Marks
Minor scratches and small dings are the most common issues on tables and chair arms.
1. Removing Light Surface Scratches
- The Walnut Method: For shallow hairline scratches on medium-to-dark wood, rub the meat of a raw walnut directly over the scratch. The natural oils and dark pigments in the nut flesh fill and darken the scratch instantly.
- Wood Touch-Up Markers: Select a felt-tip wood touch-up marker or stain pen that matches your wood tone (Cherry, Oak, Walnut). Dab lightly into the scratch and wipe away excess ink immediately with a soft cloth.
2. Steam-Lifting Dents in Solid Wood
Wood fibers compress when struck by heavy objects. You can swell Compressed fibers back to their original height using heat and moisture:
- Lay a clean, damp cotton cloth directly over the dent.
- Place a clothes iron set to high heat over the damp cloth for 10 to 15 seconds.
- The generated steam forces wood fibers to expand. Repeat until the dent rises flush with the surrounding wood surface.
Step 3: Repairing Deep Gouges, Cracks, and Chips
When wood material is missing or deeply gouged, you must fill the cavity with structural fillers.
- Clean the Cavity: Scrape out loose dirt, splintered wood, and old wax inside the gouge using a fine utility knife.
- Apply Wood Dough or Wax Fill Sticks:
- For Unstained/Bare Wood: Press acrylic wood dough or moldable wood filler into the hole using a putty knife, leaving the fill slightly crowned above the surface to account for drying shrinkage.
- For Pre-Finished Wood: Melt matching hard wax filler sticks into the gouge using a heat tool, then level the surface with a plastic scraper.
- Sand and Blend: Once dry, sand the patch level with 220-grit fine sandpaper, working strictly in the direction of the wood grain. Touch up the patch with matching stain and a dab of clear topcoat sealer.
Step 4: Eliminating Water Rings and Heat Stains
White haze or white rings on wooden tables are caused by trapped moisture under the clear finish—usually from cold drink glasses or hot coffee mugs.
1. Treating White Water Rings (Trapped Moisture)
- Heat Gun or Hairdryer Method: Set a hairdryer to medium-high heat and sweep it back and forth 2 inches above the white ring. The mild heat evaporates the trapped moisture, causing the white haze to disappear magically within minutes.
- Mayonnaise or Petroleum Jelly: Spread a thick layer of full-fat mayonnaise over the ring and let it sit overnight. The natural oils penetrate the finish, displacing the moisture. Wipe clean in the morning.
2. Dark Water Stains (Wood Fiber Damage)
If the water ring has turned dark brown or black, water has penetrated through the finish directly into the wood fibers, causing mold or oxidation. This requires stripping the topcoat finish, bleaching the dark stain with oxalic acid (wood bleach), neutralizing with water, resanding, and applying fresh stain and finish.
Step 5: Stabilizing Wobbly Chair Legs and Loose Joints
Over time, wood expands and contracts with ambient humidity, causing original PVA wood glue inside dowels and mortise-and-tenon joints to fail.
- Disassemble the Joint: Gently tap the loose joint apart using a rubber mallet. Scrape away all old, hardened glue remnants from the wooden dowels and socket holes. New glue will not adhere to old glue!
- Apply High-Strength Wood Glue: Coat the dowels and socket interiors generously with PVA yellow wood glue (such as Titebond II or Titebond III).
- Clamp Firmly: Reassemble the joint and apply bar clamps or strap clamps to hold the pieces tightly together under pressure. Wipe away squeezed-out glue immediately with a damp paper towel. Leave clamped for 24 hours to cure fully.
Step 6: Polishing, Waxing, and Routine Wood Maintenance
Maintaining healthy moisture levels in wood prevents cracking and keeps finishes looking brand new.
- Avoid Silicon-Based Polishes: Steer clear of cheap aerosol furniture sprays containing silicone. Silicone creates a slippery build-up (“fisheye”) that attracts dust and makes future refinishing almost impossible.
- Apply Quality Paste Wax: Apply a thin coat of natural carnauba paste wax or beeswax using a cheesecloth once every 6 to 12 months. Buff vigorously with a clean microfiber towel to achieve a deep, protective glass-like sheen that repels water and dust.
- Control Indoor Humidity: Keep indoor relative humidity between 35% and 55% using humidifiers in winter to prevent solid wood table tops from splitting or warping.
Quick Reference Summary Checklist
- Match your repair method to wood type: hardwood tolerates sanding, while veneer requires extra caution.
- Lift compressed wood dents using a damp cloth and a hot clothes iron.
- Remove white water rings using mild heat from a hairdryer or a layer of mayonnaise.
- Clean out old glue completely before gluing and clamping wobbly furniture joints.
- Use paste wax or natural beeswax for polishing—avoid aerosol sprays containing silicone.
Final Thoughts
Repairing and maintaining wooden furniture at home is a rewarding DIY effort that saves money while preserving the beauty and historical charm of your home furnishings. By addressing surface scratches promptly, lifting water rings, filling deep gouges, and nourishing wood surfaces with high-quality waxes, you can keep your wooden heirlooms in flawless condition for decades.
