

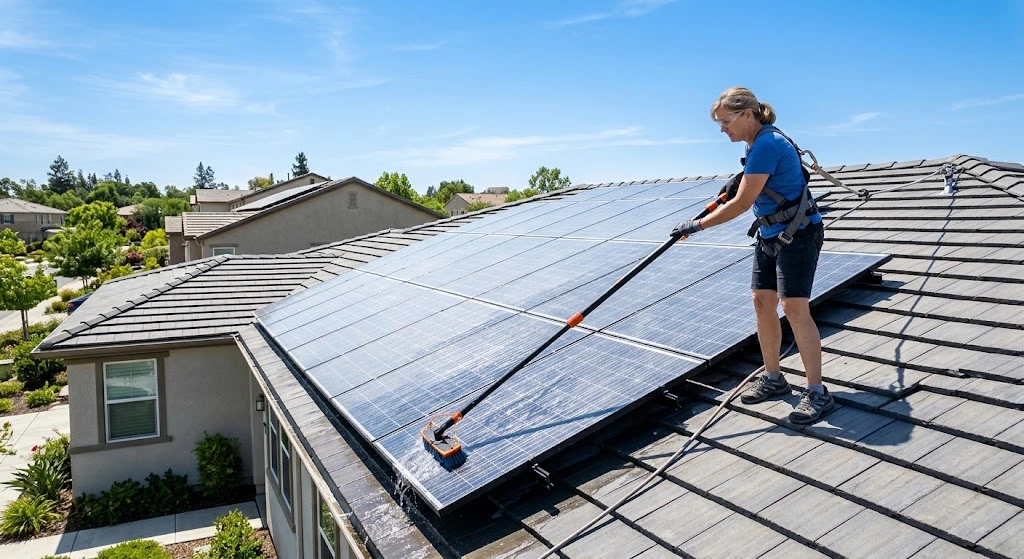
Installing a residential solar photovoltaic (PV) system is one of the most effective investments homeowners can make to reduce electricity bills, gain energy independence, and lower carbon footprints. Modern solar panel arrays are engineered for long-term durability, with most tier-one manufacturers offering 25-year performance warranties. However, like any outdoor building system exposed to continuous weather elements, solar panels require ongoing maintenance to operate at peak solar conversion efficiency.
Over time, environmental contaminants—including airborne dust, dirt, bird droppings, tree sap, pollen, industrial soot, and seasonal snow cover—accumulate across solar panel glass surfaces. Dust accumulation (known as “soiling”) acts as a physical barrier that prevents sunlight from reaching silicon solar cells, reducing total system energy output by 10% to as much as 30% in dry, arid, or high-dust regions.
In this exhaustive 2500+ word DIY master guide, you will learn how soiling affects solar efficiency, how to perform safe ground-level and roof-level panel inspections, the step-by-step process for cleaning solar glass without scratching anti-reflective coatings, winter snow maintenance, electrical monitoring, and how to create a routine preventive care schedule.
Step 1: Understand Solar Panel “Soiling” and Efficiency Loss
Solar panels generate direct current (DC) electricity through the photovoltaic effect, where light photons displace electrons within silicon semiconductor wafers. When solar glass becomes coated with grime, less light reaches the silicon layer beneath.
1. Factors That Influence Power Loss
- Geographic Location: Homes in dry, dusty regions with infrequent rainfall suffer far higher efficiency drops than regions with frequent rain showers.
- Panel Tilt Angle: Flat or low-pitch solar arrays (under 10 degrees tilt) accumulate dirt much faster because rainwater cannot naturally slide off and wash away debris.
- Bird Droppings & Local Trees: Bird droppings and sticky tree sap create concentrated, opaque “hotspots” on panels that completely block sunlight to individual cell groups, causing localized overheating and bypass diode activation.
- Industrial Soot & Coastal Salt Rim: Homes near highways, industrial parks, or coastal salt spray environments accumulate greasy, sticky films that require manual scrubbing rather than basic rain rinsing.
Step 2: Essential Equipment and Safety Precautions for Solar Cleaning
Safety is the absolute priority when maintaining solar equipment, especially on elevated roofs.
Required DIY Cleaning Tools:
- Telescopic Water-Fed Pole: Extendable pole (12 to 24 feet) with a soft-bristled brush attachment.
- Non-Abrasive Microfiber Pads or Sponge Brushes: Designed specifically for optical glass.
- Squeegee with Rubber Blade: For drying glass surfaces to prevent mineral hard-water spotting.
- Hose with Spray Nozzle: Standard garden hose with an adjustable gentle spray nozzle (Never use a high-pressure power washer!).
- Deionized (DI) Water Filter or Distilled Water: Prevents mineral deposits left behind by hard tap water.
- Personal Protective Equipment (PPE): OSHA-approved full-body roof safety harness, non-slip rubber-soled work boots, and safety glasses.
Crucial Safety Rules:
- Never Walk or Step on Solar Panels: Solar modules feature toughened glass, but human weight causes micro-cracks inside silicon wafers that ruin cells permanently.
- Avoid Cleaning Hot Glass in Direct Sunlight: Thermal shock occurs when cold water touches solar glass baked by 140°F (60°C) summer sun, causing glass panels to shatter instantly. Clean panels during early morning or late evening hours.
- DO NOT Use Pressure Washers: High-pressure water jets break waterproof seals around panel frames, allowing moisture into internal junction boxes.
- Avoid Harsh Chemicals: Abrasive powders, bleach, ammonia, and harsh detergents scratch anti-reflective coatings and corrode aluminum framing.
Step 3: Step-by-Step DIY Solar Panel Cleaning Process
Follow this systematic workflow to restore maximum energy generation safely.
1. Shut Down the Solar Inverter System
Before applying water near electrical equipment, turn off your solar array:
- Switch the AC disconnect switch (located near your main electrical panel) to “OFF.”
- Switch the DC disconnect switch (located near the solar inverter) to “OFF.”
2. Perform a Ground-Level Visual Inspection
Use binoculars or a camera zoom lens to inspect panel surfaces from the ground. Look for:
- Visible grime, bird droppings, or thick dust accumulation.
- Cracked or shattered solar glass.
- Disconnected or dangling solar conduit wiring under panel mounting racks.
3. Rinse Loose Debris
Stand on the ground or a secure ladder position. Use your garden hose to spray a gentle shower of water across the top edge of the panel array, allowing water to stream down and flush away loose dust, sand, and grit.
4. Scrub Stubborn Contaminants
- Attach a soft microfiber brush to your extendable telescopic pole.
- Dip the brush into a bucket of clean water mixed with a few drops of mild dish soap (or specialized solar glass cleaner).
- Gently scrub sticky spots, bird droppings, and sap from the top down using smooth, straight strokes.
5. Final Rinse and Squeegee Dry
Rinse away all soap suds thoroughly using deionized or distilled water. Drag a squeegee blade across the glass to remove water drops, preventing hard-water calcium spots from forming as the glass dries in the sun.
Step 4: Winter Maintenance and Snow Removal Tips
Winter snow accumulation blocks 100% of incoming sunlight, dropping solar energy output to zero until the snow slides off or is cleared.
1. Natural Snow Shedding
Because solar panels are dark and installed at an angle, sunlight penetrating light snow layers quickly warms the black silicon cells. Heat transfers to the glass, melting the bottom layer and causing large snow sheets to slide off naturally.
2. Manual Snow Removal
If heavy snow lingers for days, use a specialized roof rake equipped with a soft foam head (like a SnoPro) to pull loose snow off the panels from the ground. Never use metal snow shovels, ice scrapers, or salt de-icers on solar arrays.
Step 5: Monitoring Inverter Performance and Spotting Issues
Physical cleaning is only half of effective solar maintenance—monitoring energy production metrics ensures your system operates at peak capacity year-round.
1. Track Daily Solar Production via Mobile App
Modern solar systems (Enphase, SolarEdge, Tesla) include mobile monitoring apps that display real-time power generation graphs in kilowatt-hours (kWh).
- Compare weekly energy production against historical baseline data from the same month last year.
- A sudden 15–20% drop in generation during clear, sunny weather indicates either heavy soiling, shading from overgrown tree branches, or an electrical micro-inverter failure.
2. Inspect Inverter Status Lights
Check your central solar inverter unit once a month:
- Solid Green Light: System operating normally at full efficiency.
- Blinking Yellow/Orange Light: System warning or communication network drop.
- Solid Red Light: System fault, blown fuse, or ground-fault condition requiring professional service.
Quick Reference Maintenance Checklist
| Task | Recommended Frequency | Method / Action |
| Mobile App Performance Audit | Weekly | Check kWh production graphs for sudden drops. |
| Visual Roof / Panel Inspection | Monthly | Check for bird nests, loose wires, and leaf debris. |
| Panel Surface Washing | 2 to 4 Times a Year | Hose rinse and gentle telescopic pole brush scrub. |
| Inverter & Wiring Check | Bi-Annually | Inspect status lights, clear dust from inverter fans. |
| Professional Roof & Electrical Audit | Every 3 to 5 Years | Certified solar technician inspection of seals and torque bolts. |
Summary Checklist for Maximum Solar Output
- Clean panels in the early morning or late evening to prevent thermal shock glass cracking.
- Use extendable telescopic poles to clean panels from the ground whenever possible.
- Never use high-pressure washers, abrasive sponges, or chemical detergents.
- Rinse with deionized/distilled water and squeegee dry to eliminate hard-water spots.
- Use a soft foam snow rake for clearing heavy winter snow accumulation.
- Check solar monitoring app graphs weekly to catch performance drops early.
Final Thoughts
Solar panel maintenance is a low-effort, high-reward DIY routine that protects your renewable energy investment. By keeping panel glass clean from dirt and environmental debris, monitoring system generation metrics, and catching electrical issues early, you ensure your solar system delivers maximum green electricity and maximum utility savings for decades to come.
