

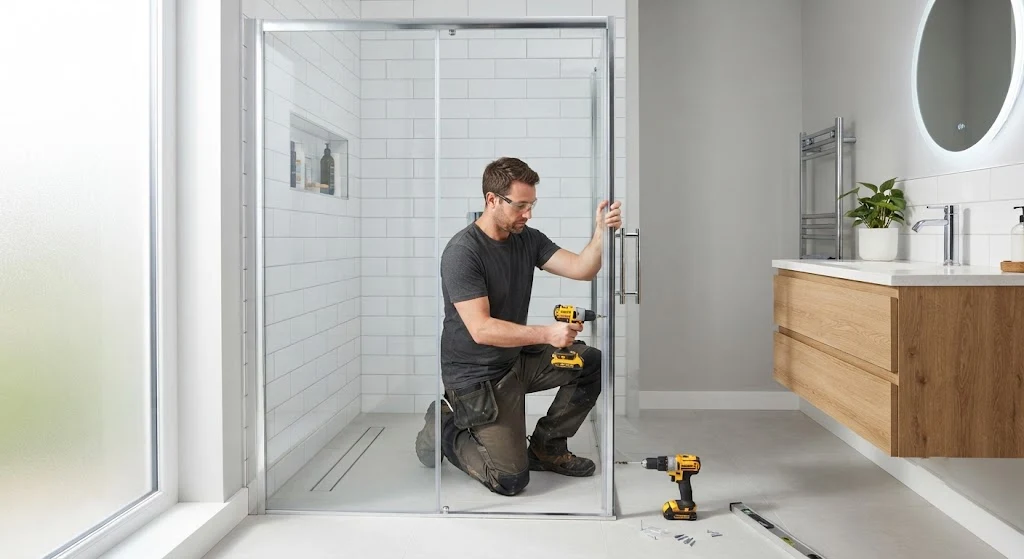
Installing a shower door is one of the easiest ways to give your bathroom an instant upgrade. You don’t need to be a professional contractor to pull it off, either. With the right tools, a free afternoon, and a bit of patience, most homeowners can swap out an old shower curtain or worn-out door for a sleek new enclosure in just a few hours.
This guide walks you through everything you need to know, from choosing the right type of door to sealing it up so it’s completely watertight. Let’s get started.
Quick Project Overview
| Detail | Info |
|---|---|
| Skill Level | Easy (1 out of 5) |
| Estimated Time | 2–4 hours |
| Estimated Cost | $400–$648 for a 5-foot-wide enclosure |
The trickiest part of the whole job is lining the door up with the frame so it seals properly. Take your time here, and the rest of the project comes together quickly.
Types of Shower Doors
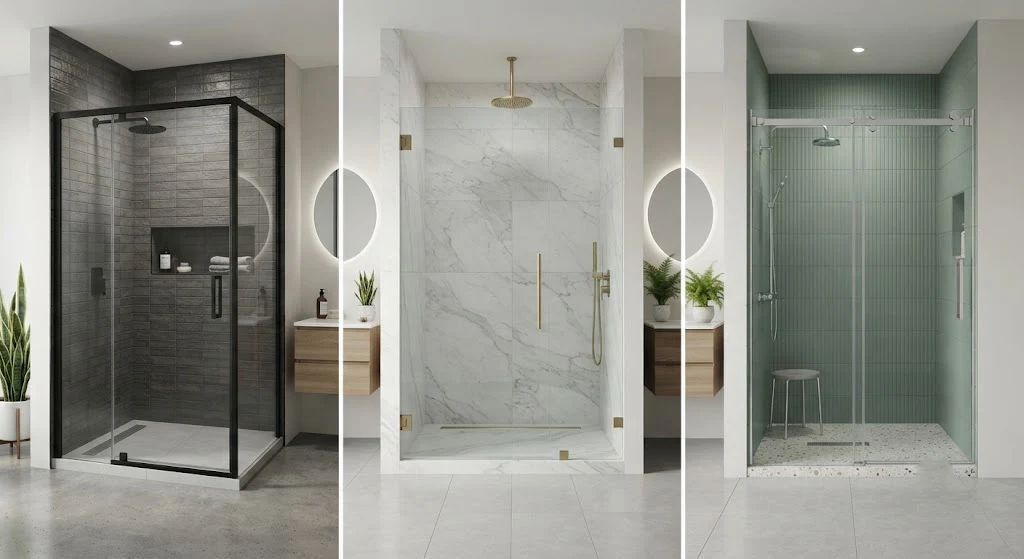
Before you pick up a single tool, it helps to know your options. Each type of shower door has its own installation quirks, so choosing the right one for your skill level and budget matters.
Framed Shower Doors
Framed shower doors are the most budget-friendly and beginner-friendly option on the market. A metal frame wraps around the glass panels, adding extra stability and helping create a tight, leak-resistant seal. Because the frame does a lot of the structural work, these doors are typically the easiest to install yourself. This guide focuses on installing a traditional framed shower door.
Frameless Shower Doors
Frameless shower doors give bathrooms a clean, modern, spa-like feel. Instead of a metal frame, they rely on thick tempered glass for support. That’s great for style, but it makes installation trickier. The glass alone can weigh around 85 pounds, so you’ll need a helper and a steady hand.
The hinges on a frameless door work like clamps, gripping the glass tightly with a neoprene washer on the inside of each one. Once the screws are tightened, the glass stays locked in place. Before setting the door, installers place spacer blocks on the threshold and carefully measure both sides to make sure the glass sits parallel to the wall and any neighboring panel. Because of the precision required, frameless doors are best suited to homeowners who already have some DIY experience — or who are comfortable hiring a pro for this step.
Sliding Shower Doors
Sliding (or bypass) shower doors are a smart choice for smaller bathrooms where a swinging door might bump into a toilet, vanity, or wall. These doors use two or more glass panels — framed or frameless — that glide along tracks at the top and bottom of the shower opening, saving valuable floor space.
Tools and Materials You’ll Need
Gather everything ahead of time so you’re not running to the hardware store mid-project.
Essential Tools
- Tape measure (25-foot recommended)
- 4-foot level
- Drill with masonry and standard bits (3/16-inch and 7/32-inch)
- Hacksaw
- Ratcheting screwdriver set (flathead and Phillips)
- Caulking gun
- Utility knife
- Single-cut file (10-inch)
- Automatic punch
- Plastic mallet
- Wet/dry vacuum
- Safety glasses and work gloves
Required Materials
- Shower door kit (door, tracks, and hardware)
- Clear, mildew-resistant silicone caulk
- Plastic wall anchors
- Stainless steel screws (sizes specified in your kit)
- Cleaning supplies for after installation
Preparing for Installation
Good prep work prevents headaches later, so don’t skip this stage.
Measure the opening. Check the width of your shower opening in three spots: at the threshold, at 5 feet high, and halfway between. Always order your door based on the smallest measurement, so it’s guaranteed to fit. It’s also smart to measure from the door’s pivot point outward to make sure it can swing freely without hitting a fixture or wall.
Check for plumb. Use your level to see whether the shower walls are perfectly vertical. If a wall is off by more than half an inch over 5 feet, you’ll likely need a filler strip so the door can sit plumb. Skipping this step can leave you with a door that doesn’t seal properly and leaks over time.
Pro Tip: A plumb bob can actually give you a more reliable reading than a standard level, since even a small bump can throw off a level’s accuracy. A wall that’s just 1/16 of an inch out of plumb is generally still fine for installation, but anything more should be corrected first.
Step 1: Install the Base Track
The base track is the foundation everything else builds on, so getting it right sets the tone for the rest of the project.
Cut the track to size. Measure your shower threshold carefully, then use a hacksaw to cut the aluminum base track so it fits snugly between the stall walls. Smooth any rough edges with a file, and vacuum up metal filings right away so they don’t scratch your bathroom floor.
Position and secure it. Center the track from front to back on the threshold and mark its position with a pencil in case it shifts. Some installers add a thin bead of silicone caulk underneath before final placement, but check your manufacturer’s instructions first — some brands recommend skipping this to allow for proper drainage.
Step 2: Mount the Side Jambs
The side jambs give your door its vertical support, so they need to be perfectly plumb.
Install the hinge-side jamb. Hold the jamb against the wall and fit its base into the track. Use your level to adjust it until it’s perfectly upright, then mark your screw holes through the jamb. Remove the jamb, punch small starter divots at each mark, drill with a 3/16-inch masonry bit, and insert wall anchors. Reposition the jamb and secure it with stainless steel screws.
Pro Tip: Slide the hinge-side jamb up about 1/8 of an inch past the top of the door opening before securing it. This small gap gives the door room to swing freely without catching on the header.
Set up the strike-side jamb. If your door doesn’t include a side panel, attach the magnetic strike rail to this jamb first. Close the door to check alignment, mark the jamb’s position, and secure it the same way you did the hinge side. If your kit includes a glass side panel, fit that into place before marking and securing the jamb.
Double-check that the gap between the jamb and the door edge stays consistent from top to bottom. If your floor isn’t level, you may need to shim beneath the strike-side jamb so the header sits level before you drive in the final screws.
Step 3: Hang the Shower Door
This is where an extra pair of hands really pays off.
Attach the door to the hinge rail. Lift the door with the hinge rail attached so it swings outward from the shower, then slip the rail into the jamb you already installed. Move slowly — bumping the glass against a hard surface can crack or chip it.
Adjust for plumb. Once the door is hanging, check the strike-side edge with your level. If it’s off, gently pull the hinge rail out of the jamb slightly at the top or bottom — you typically have about half an inch of wiggle room. Once everything lines up, have a helper hold the door steady while you drill pilot holes through the hinge rail into the jamb, then secure it with the screws included in your kit.
Step 4: Add the Header and Drip Rail
Set the header. If your kit includes a header, measure and cut it to length, then slide it over the top of the hinge jamb (and side panel, if you have one). Drill pilot holes through the header into the jambs and secure with screws to lock the frame together.
Attach the drip rail. The drip rail keeps water from escaping the enclosure. Cut it to match the width of the door with a hacksaw, file the ends smooth, and snap the vinyl sweep into the rail’s groove. Attach the rail to the bottom of the door, angling it slightly toward the hinge side so water drains back into the shower instead of onto your floor.
Step 5: Seal and Finish
Apply silicone caulk. Run a bead of clear, mildew-resistant silicone along the inside and outside edges of the base track, plus the inside edges of both jambs. Smooth it immediately for a clean finish. This step is what actually makes your shower watertight — skip it, and you’re risking water damage down the road.
Install the handles. Line up the outside handle with the pre-drilled holes, attach the interior handle, and tighten the set screws to finish the job.
Troubleshooting Common Problems
Even careful installations can hit a snag or two. Here’s how to handle the most common ones.
Uneven walls. If your walls are noticeably out of plumb, shim behind the jambs to level things out. For more extreme cases, a filler strip along the full wall length may be necessary to give the frame a flat surface to mount to.
Leaks and gaps. After installation, run a water test and watch closely for leaks around the base track and jambs. Add extra silicone to any weak spots. If there’s a gap between the door and frame, adjust the door’s alignment or add a sweep or extra weatherstripping to close it up.
How Much Does a Shower Door Cost?
Shower doors typically run $530 to $1,390, though budget options can drop as low as $162. Where your project lands depends on a few factors:
- Door type (framed, frameless, or sliding)
- Glass thickness and quality
- Size of your shower opening
- Any customization you choose
- How complex your shower’s shape is
DIY vs. Professional Installation
Installing the door yourself saves you on labor costs — your main expense is the shower door kit itself, which usually runs $400–$648 for a standard 5-foot enclosure. Hiring a pro instead typically costs $500–$1,000, but you get expert precision and often a workmanship warranty. If you’re confident with basic tools and have a helper on hand, DIY is a great way to save money. If your bathroom has unusual angles or you’re installing a frameless door, it may be worth paying for professional installation.
Final Thoughts
Installing a shower door might sound intimidating, but it’s a very doable weekend project with the right prep and a little patience. Take your time on the plumb checks and sealing steps especially — those are what stand between you and a bathroom upgrade that actually holds up over time. If you run into trouble along the way, there’s no shame in calling in a professional to finish the job.
Got questions about your next home upgrade? zillohome has you covered with more DIY guides, home tips, and lifestyle inspiration.
