

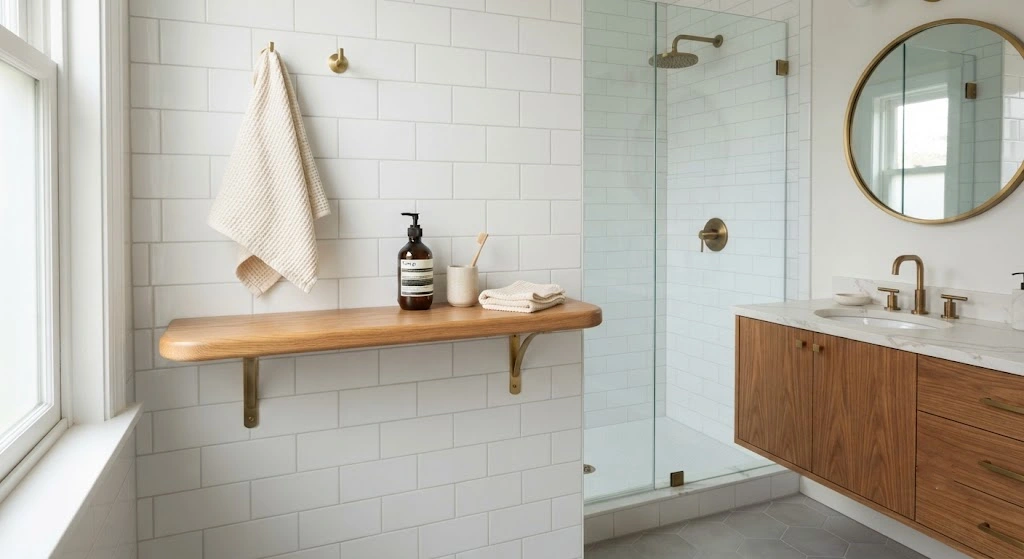
An outdated built-in soap dish can make an entire bathroom look tired, even if the rest of the space is in great shape. The good news? You don’t need to rip out tile or hire a contractor to fix it. Custom furniture builder Nathan Gilbert shares a simple, budget-friendly method for swapping a chipped or dated ceramic soap dish, toothbrush holder, or towel bar for a custom wood shelf that instantly upgrades the look of your bathroom.
This project blends basic demolition skills with a bit of woodworking, and it’s a great weekend job for anyone comfortable using a drill and a pry bar. Below, we’ll walk through every step, from safely removing the old ceramic fixture to mounting a brand-new shelf that covers the damage and adds real style.
Why Replace a Built-In Ceramic Soap Dish?
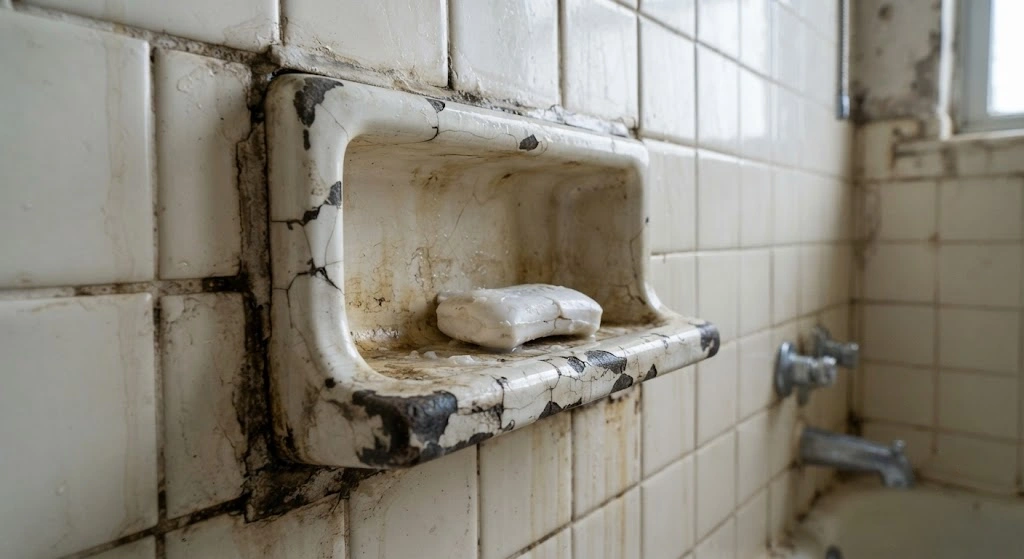
Older homes often have ceramic soap dishes, toothbrush holders, or towel bars set directly into the tile. Over time, these fixtures can crack, discolor, or simply go out of style. Removing them without damaging surrounding tile is tricky, and even a clean removal leaves a hole or rough patch that needs to be covered.
Instead of matching grout and tile (which is expensive and hard to blend seamlessly), installing a custom shelf over the damaged area is a faster, cheaper, and more stylish fix. It also gives you the chance to add extra storage, like hooks or a small shelf for jewelry and toiletries.
Step 1: Protect the Work Area
Before you touch a single tile, set up your workspace to avoid a mess and protect your fixtures.
- Lay drop cloths across the floor and countertop to catch dust and debris.
- Cover your vanity and any nearby fixtures with plastic sheeting.
- Always wear safety glasses and work gloves. Ceramic tile can crack unpredictably and produce sharp shards, so eye and hand protection are non-negotiable.
Taking five extra minutes here saves a lot of cleanup time later, and more importantly, keeps you safe.
Step 2: Remove the Old Ceramic Fixture
Removing a tiled-in soap dish takes patience. Rushing this step is the most common way to crack surrounding tiles.
- Score the grout. Use a scoring knife to carefully cut through the grout surrounding the fixture. Go slowly and remove as much grout as you can from the joints. The more grout you clear, the easier the fixture will be to pry loose, and the lower your risk of damaging nearby tiles.
- Pry it loose. Gently tap a pry bar into the grout joint with a hammer, then apply steady, gradual pressure to pop the fixture away from the wall. Avoid sudden force. Slow, even pressure is safer for both you and the tile.
- Clean the surface. Once the fixture is off, use a chisel scraper to remove any leftover adhesive, mortar, or grout residue from the wall. You want as flat a surface as possible before mounting your new shelf.
Step 3: Measure and Plan Your Replacement Shelf
Now comes the fun part: designing the fixture that will replace your old soap dish.
Measure the damaged area carefully, and choose a shelf size that fully covers it. A few things to consider:
- Coverage: The shelf should be large enough to hide all chips, holes, and rough patches.
- Placement: Decide whether you want the shelf centered on the vanity for a balanced, symmetrical look.
- Clearance: Double-check that the shelf won’t interfere with nearby outlets, faucets, or mirrors.
You can buy a pre-made shelf in the size you need, or build a custom one like Nathan did. He crafted his shelf from quarter-sawn white oak, finished it with a warm satin polyurethane, and added brass shelf brackets, small hooks, and a wall-mounted jewelry rack. Custom shelving like this lets you match your bathroom’s existing hardware finishes for a cohesive, high-end look.
Step 4: Lay Out the Shelf Position
Getting the placement right is what separates a professional-looking install from a crooked, amateur one.
- Pre-drill mounting holes. Measure two mounting points equal distance from the shelf’s center, then drill and countersink the holes so screw heads sit flush with the wood. This creates a clean, seamless finish.
- Tape the wall. Apply several strips of painter’s tape where the shelf will hang. Tile is hard to mark on and cleaning off pen or pencil marks can be annoying, so taping gives you a clean writing surface that won’t leave residue.
- Mark the center. Find the center point of both the shelf and the vanity, then mark it on the tape so your shelf lines up symmetrically.
- Set the height. Position the shelf so its top edge doesn’t land directly on a grout line. If it does, you’ll end up with a visible gap where the shelf meets the wall. Use a framing square and a torpedo level to draw a straight, level horizontal guideline.
- Mark your holes. Hold the shelf against the wall, align it with your center and height lines, then mark the mounting hole locations through the pre-drilled holes. A long-nib marker works well for reaching through small holes accurately.
Step 5: Drill Into the Tile
Because this spot is unlikely to line up with a wall stud, you’ll need wall anchors rated for tile over drywall.
Nathan recommends Toggler Alligator ¼” all-purpose flanged wall anchors, which are designed to expand and grip securely in hollow wall cavities once a screw is driven in.
Before installing the anchors:
- Use a carbide-tipped tile drill bit sized to match your anchor’s packaging instructions.
- Set your drill to a low speed. Drilling too fast is one of the top causes of cracked tile, so slow and steady is the way to go.
Step 6: Install the Wall Anchors
Insert the anchors into your freshly drilled holes, then gently tap them flush with the tile surface using a hammer. Go slowly here too. Forcing anchors in too quickly can crack tile that’s otherwise intact.
Step 7: Mount the New Shelf
Line the shelf up with the installed anchors and drive the screws in securely.
For a polished, designer touch, Nathan swapped the standard screws that came with the anchors for solid brass screws to match the shelf’s brass hardware. It’s a small detail, but it makes a noticeable difference in the finished look.
A couple of final tips:
- Tighten screws snugly, but avoid overtightening, which can strip the anchor or crack the wood.
- For a professional finish, align all screw slots in the same direction using a screwdriver.
Bonus Project: Hiding Old Towel Bar Holes
If you’re also removing an old ceramic towel bar, you’ll likely be left with a few visible holes in the tile. Nathan’s solution was to install decorative towel hooks mounted on small quarter-sawn white oak backplates. This covers the old holes completely while adding a stylish accent that matches the new shelf, tying the whole bathroom update together.
Materials You’ll Need
- Drop cloths
- Plastic sheeting
- Painter’s tape
- Long-nib marker
- ¼” all-purpose flanged wall anchors
- Solid brass flat Phillips screws (10 x 2-½”)
- Quarter-sawn white oak lumber
- Warm satin polyurethane finish
- Solid brass decorative wall-mounted shelf brackets
- Wall-mounted jewelry organizing bar
- Square brushed gold towel hooks
Tools You’ll Need
- Safety glasses
- Work gloves
- Scoring knife
- Pry bar
- Hammer
- Chisel scraper
- Tape measure
- Framing square
- Torpedo level
- Drill/driver
- ¼” carbide-tipped tile drill bit
- Phillips bit
Final Thoughts
Replacing an old, cracked soap dish doesn’t have to mean a full tile renovation. With a few basic tools, some patience, and a custom shelf, you can cover up years of wear and give your bathroom a fresh, updated look in a single weekend. Whether you buy a pre-made shelf or build your own like Nathan did, the key steps stay the same: protect your space, remove the old fixture carefully, drill smart, and anchor securely.
Once you’re done, you won’t just have a fix for that old soap dish. You’ll have a stylish new feature that makes the whole bathroom feel more intentional.
