

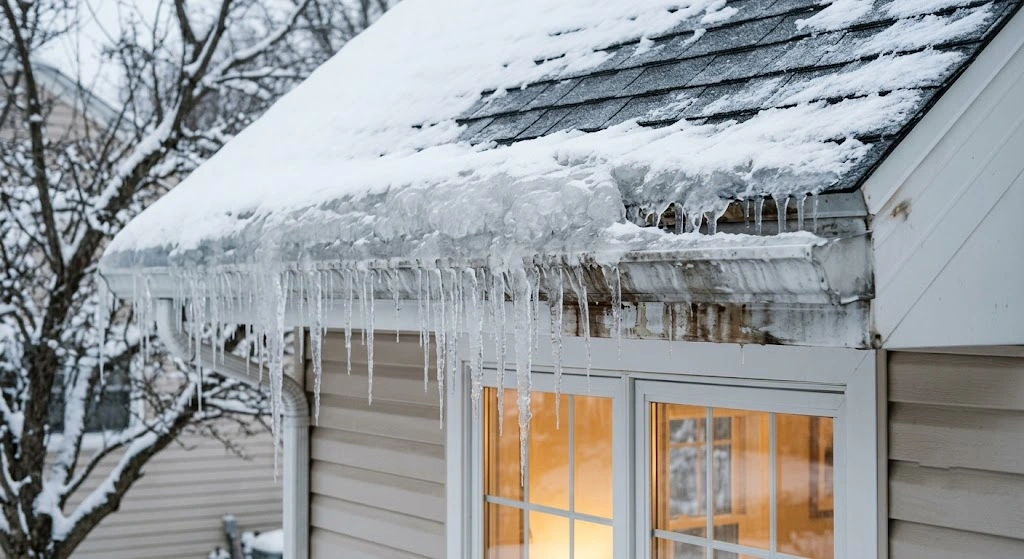
To get rid of ice dams, fill a nylon stocking with calcium chloride ice melt and lay it across the dam so it melts a channel for water to drain. Never use rock salt or a hammer. For long-term relief, remove roof snow and fix the attic heat loss causing the problem.
If you’ve spotted a thick ridge of ice building up along your roofline, you’re dealing with an ice dam. Learning how to get rid of ice dams quickly can save you from a much bigger headache: water leaking into your ceilings, walls, and insulation. The good news is that you have a few safe options, and none of them require you to grab a hammer and start chipping away.
This guide walks you through what actually works, what to avoid, and how to stop ice dams from coming back next winter.
What Causes Ice Dams in the First Place
An ice dam forms when heat from inside your house leaks into the attic and warms the roof unevenly. The root cause often starts inside the home, as heat rises into the attic, warming the roof deck and melting the snow above it. That meltwater runs down the roof until it hits the colder overhang, where it refreezes into ice.
Ice dams take shape soon after roof snow starts melting, and once the process starts, it feeds itself. More snow melts, more water flows down, and the dam keeps growing. Eventually it traps a pool of water behind it with nowhere to go but under your shingles.
Ice dam formation usually comes down to inadequate attic ventilation, poor insulation, and air leaks that let warm air escape into the attic. Fix those three things and you fix the problem at its source.
Why You Shouldn’t Ignore an Ice Dam
It’s tempting to wait it out until spring, but that’s risky. Ice dams can lift shingles as they expand, strain your roof and gutters, and let meltwater seep under shingles and into your walls, insulation, and ceilings. Trapped moisture also creates the perfect setup for mold.
The longer an ice dam sits on your roof, the higher the risk of a leak forming. So while removing an ice dam isn’t an emergency you need to handle in the middle of a snowstorm, it’s not something to put off for weeks either.
Safe Ways to Remove an Ice Dam
Melt a Channel With Calcium Chloride
This is one of the most reliable DIY methods. Fill a nylon stocking with calcium chloride ice melt, then place it vertically across the ice dam so it melts a channel through the ice. The water trapped behind the dam can then drain out through that channel instead of backing up under your shingles.
Skip rock salt or sodium chloride, since these can damage your roofing materials. Calcium chloride works faster and is gentler on shingles, though it can still harm plants underneath your gutters, so cover any shrubs with a tarp first.
Before you place the stocking, use a roof rake to clear snow three to four feet back from the roof edge, being careful not to damage the roof or block any walking paths.
Run Warm Water Over It
Gently running hot water over the ice dam will melt it and let the water drain out through the gutters. This method works well in a pinch, but it takes patience, and you’ll need a safe way to get the water up onto the roof without climbing on ice yourself.
Cut Channels With a Steamer
Professional ice dam removal companies often use low-pressure steamers to melt channels straight through the ice without damaging shingles underneath. It’s slower than a pressure washer but far safer for your roof, since it melts ice on contact instead of blasting it.
Call a Professional
If the ice dam is large, if you’re already seeing water stains inside your home, or if getting on the roof feels risky, it’s smart to bring in a pro. Chipping away at ice dams yourself can damage shingles and increase the chance of leaks, and working on a roof in winter conditions can be dangerous. A trained roofer has the right tools and can spot damage you might miss.
Methods to Avoid
Not every popular fix actually works, and some make things worse. Heat cables laid directly on top of an existing ice dam usually aren’t hot enough to remove it, so the dam just keeps growing right over the cable. That traps even more water on your roof than if you’d left it alone.
Salt-filled stockings have the same problem in cold weather. Salt’s ability to melt ice depends heavily on temperature, and the melted water often refreezes just an inch or two away, creating a bigger icy mess.
And whatever you do, don’t grab a hammer, axe, or ice pick. Chipping at an ice dam almost always damages the shingles underneath, turning a temporary problem into a permanent roof repair.
How to Get Rid of Ice Dams for Good
Melting an existing dam buys you time, but it won’t stop the next one from forming. Getting rid of ice dams for good comes down to one simple idea: keep the entire roof the same temperature as the eaves. Here’s how to actually make that happen.
Add Attic Insulation
Adding insulation to the attic floor keeps heat from escaping through the attic in the first place. This is usually the single biggest factor in ice dam prevention, since less heat rising means less snow melting unevenly on your roof.
Improve Ventilation
Soffit vents beneath the eaves draw in cool air, while ridge vents at the top of the roof let hot air escape. Together, this keeps your entire roof cold and consistent, which stops the melt-and-refreeze cycle before it starts. Ventilation also helps your shingles last longer and keeps moisture from building up in the attic.
Seal Air Leaks
Sealing gaps around vents, electrical cables, chimneys, and recessed lighting keeps warm air where it belongs, inside your living space. Check your attic for daylight peeking through near the chimney or any exhaust fans that vent into the attic instead of outside, since both let warm air sneak up into the roof deck.
Keep Roof Snow to a Minimum
With no snow on the roof to melt, you remove one of the key ingredients an ice dam needs to form. A roof rake lets you clear snow from the ground after every storm, which is one of the easiest habits you can build into your winter routine.
Consider Heat Cables as a Backup
Heat cables installed before winter, not after an ice dam has formed, can help manage tricky spots like north-facing roof sections that get little sun. Just know they’re a supplement, not a fix. Heated cables are only a Band-Aid, and the real solution is improving ventilation and sealing the heat leaks warming the roof from below.
Signs You Might Already Have an Ice Dam
Keep an eye out for a few warning signs during snowy months. Large icicles hanging off your roofline or ice forming over your gutters are often the first visible clue. Inside, water stains or damp patches on your ceiling or along exterior walls can mean water has already worked its way past the roof membrane.
Catching these signs early gives you a much better shot at stopping small damage before it turns into a costly repair.
Final Thoughts
Getting rid of ice dams doesn’t have to mean risking a fall on an icy roof or making the problem worse with the wrong tools. Calcium chloride channels, gentle warm water, and professional steaming are your safest bets for melting an existing dam. From there, the real fix happens inside your attic: better insulation, stronger ventilation, and sealed air leaks. Handle those three things, and you’ll spend a lot less time worrying about ice dams every time it snows.
