

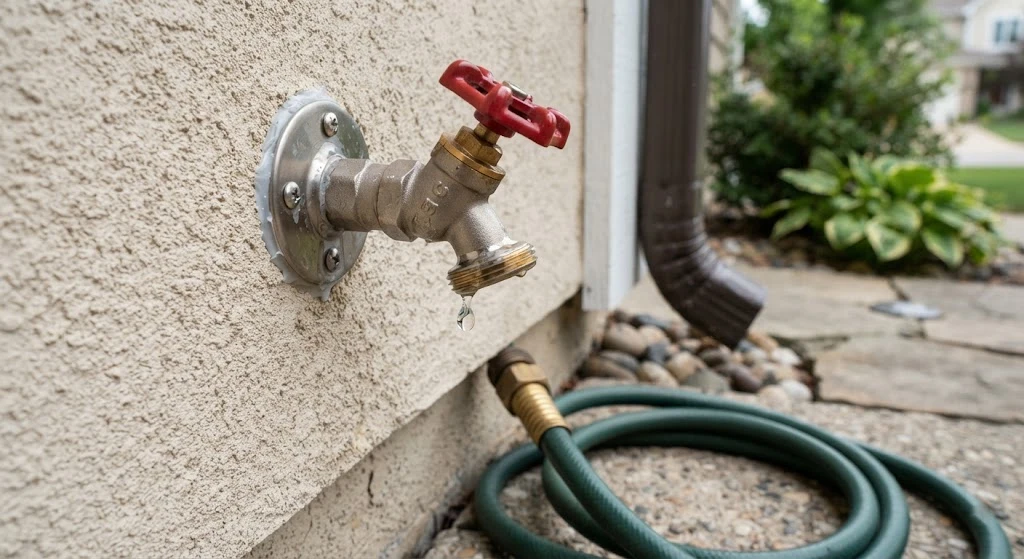
A dripping outdoor faucet is more than just annoying background noise. Left alone, a leaky hose spigot can waste hundreds of gallons of water a year, drive up your utility bill, and eventually damage the siding or foundation near your home. The good news? Fixing it is one of the easiest plumbing repairs a homeowner can tackle — no professional required.
This guide walks you through everything you need to know about rebuilding a hose spigot: what causes the leak, how to identify your valve type, and the exact steps to stop the drip for good. Whether your handle is stuck, your spout is dripping, or your water pressure has dropped, you’ll find the fix here.
What Is a Hose Spigot (And Why Does It Leak)?
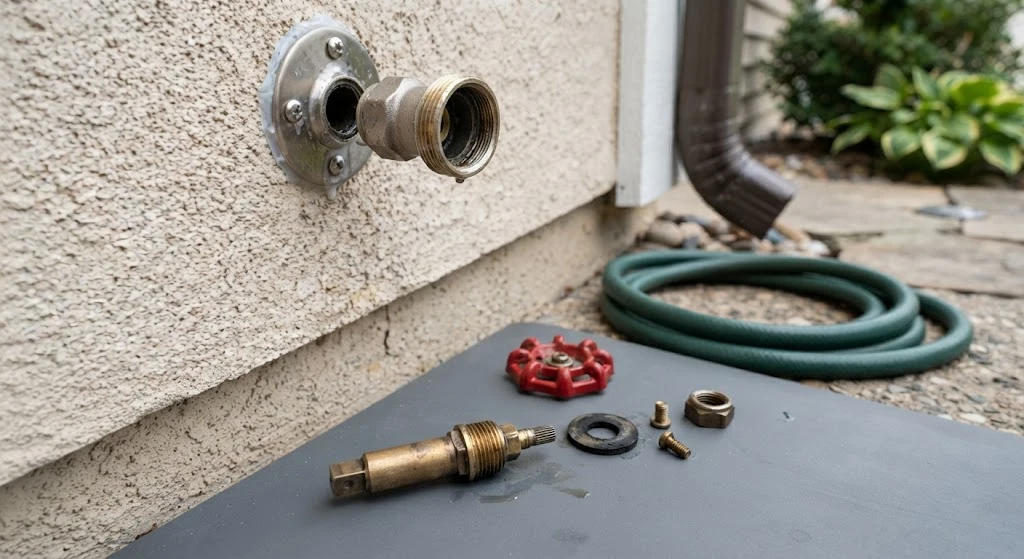
A hose spigot — also called an outdoor faucet, hose bib, or sillcock — is the valve on the exterior of your home where you connect a garden hose. It’s a fixture most people never think about until it stops working properly.
Like any part of your plumbing system, a hose spigot has internal components that wear down with regular use. Rubber washers dry out and crack. Packing material loosens. Metal valve seats get pitted or corroded. Any one of these issues can cause water to leak out instead of shutting off completely.
Signs Your Hose Spigot Needs Repair
Before grabbing your toolbox, confirm you’re dealing with a spigot problem and not something bigger. Watch for these common warning signs:
- Water dripping from the spout even when the handle is fully closed
- Leaking around the handle or stem while the water is running
- A handle that’s stiff or hard to turn
- Weaker water flow than you’d normally expect
In most cases, these problems trace back to a worn washer, damaged packing, or a rough valve seat — all of which are simple, low-cost fixes.
Know Your Valve Type Before You Start
Not all outdoor faucets are built the same way, and the repair steps can shift slightly depending on what you have. Here’s a quick breakdown of the four main types:
Gate valves. One of the oldest designs, once common on water mains. The internal stem is prone to snapping over time, which is why you don’t see many of these installed today.
Ball valves. These use a rotating ball to control water flow instead of a rubber washer. They’re durable and reliable, but they cost more and are less common on residential exteriors.
Compression valves. By far the most common type found on homes today. A rubber washer presses down against a valve seat to stop the flow of water. When these leak, the culprit is almost always a worn washer or a damaged seat.
Frost-free spigots. Built with an extra-long stem that moves the actual shut-off valve inside your home’s warmer interior wall. This design keeps water from freezing and bursting the pipe during winter, making it the standard choice in colder regions.
This guide focuses on repairing a standard compression valve, since it’s what most homeowners will encounter.
Tools and Materials You’ll Need
Gather these items before you start so you’re not running to the hardware store mid-repair:
Tools:
- Tongue and groove pliers
- Adjustable wrench
- Flathead screwdriver
- Valve reseating tool
Materials:
- Replacement rubber washers (matched to your spigot’s size)
- Teflon packing (or packing string)
- A brass screw for securing the washer, if the old one is stripped
A basic hardware store repair kit for outdoor faucets usually includes the washers and packing in one package, which makes shopping easier if you’re not sure of the exact size you need.
Safety Precautions Before You Begin
A few minutes of prep now can save you a much bigger mess later:
- Shut off the water supply to the spigot. This is usually a separate valve inside your home, near where the pipe exits to the outside.
- Open the spigot handle to release any remaining water pressure in the line.
- Put on safety glasses to protect your eyes from debris or spraying water.
- Wear work gloves to avoid cuts from old metal parts or sharp threads.
Skipping the shut-off step is the most common mistake DIYers make — always confirm the water is off before you start disassembling anything.
Step-by-Step Guide to Rebuilding a Hose Spigot
Step 1: Remove the Valve
- Confirm the water supply is fully shut off.
- Use your tongue and groove pliers to loosen the bonnet nut (the large nut just behind the handle).
- Unscrew the entire valve stem assembly out of the spigot body.
Step 2: Replace the Washer
- Locate the small screw holding the washer at the end of the stem and remove it with a flathead screwdriver.
- Pop out the old, worn washer. Inspect it — if it’s cracked, flattened, or hardened, that’s almost certainly your leak source.
- Install a new washer of the same size, smooth side facing down against the seat.
- Reattach the screw, tightening it snugly without overdoing it. Over-tightening can crack the new washer.
Step 3: Repack the Stem
- Loosen the packing nut on the bonnet to expose more of the stem’s threading.
- Wrap new Teflon packing around the stem — about one and a quarter turns is usually enough.
- Hand-tighten the packing nut back into place, then finish tightening with pliers and a wrench until snug.
This step is easy to skip, but it’s essential if you’ve noticed water seeping out around the handle itself rather than the spout.
Step 4: Reseat the Valve
- Insert a valve reseating tool into the spigot body where the stem used to sit.
- Turn the tool clockwise a few times to smooth out and clean the valve seat.
- Clear away any metal shavings or debris left behind before reassembly.
A rough or corroded valve seat is one of the most overlooked causes of a spigot that keeps leaking even after a new washer is installed. This step solves that problem in minutes.
Step 5: Reassemble and Test
- Slide the repaired valve stem back into the spigot body.
- Tighten the bonnet nut securely with your pliers.
- Turn the water supply back on and check for leaks around the handle, stem, and spout.
If everything is dry and the handle turns smoothly, your repair is complete.
Troubleshooting: What to Do If the Leak Continues
Sometimes a first attempt doesn’t fully solve the problem. Here’s how to handle the most common follow-up issues.
Still leaking after a new washer? The valve seat may be too damaged for the reseating tool to fix. At this point, replacing the entire spigot is usually more cost-effective than continuing to patch it.
Handle still hard to turn? Mineral deposits may have built up inside the valve, especially in areas with hard water. Soak the valve components in white vinegar for a few hours to break down the buildup, then rinse and reassemble.
Water pressure lower than before? This is often unrelated to the repair itself. Check the aerator at the tip of the spout for clogs or sediment, and remove and clean it if needed. It’s also worth flushing the line briefly to clear out any loose debris.
When to Call a Professional Plumber
Most spigot repairs are well within reach for a confident DIYer, but call in a licensed plumber if you run into any of the following:
- You can’t locate or access the interior shut-off valve
- Your home still has older galvanized pipes that show signs of corrosion
- The spigot connects directly to your main water line without a separate shut-off
- You discover unexpected damage, like a cracked pipe, once you open things up
There’s no shame in calling for backup — some situations genuinely call for professional tools and experience.
How to Maintain Your Hose Spigot Year-Round
A little routine care goes a long way toward avoiding repeat repairs:
- Check for leaks a few times a year, especially at the start and end of the outdoor watering season.
- Avoid cranking the handle too tight when shutting off the water — this wears down the washer faster.
- Keep the area around the spigot clean so dirt and debris don’t work their way into the valve.
- Disconnect your hose and drain the spigot before winter. Trapped water that freezes can crack pipes and fittings, turning a small maintenance task into a costly repair.
- Consider upgrading to a frost-free spigot if you live in a cold climate and still have an older, freeze-prone model.
Final Thoughts
A leaking hose spigot is one of the most common — and most fixable — plumbing problems a homeowner will face. With a basic set of tools, a new washer, and about 30 minutes of your time, you can stop the drip, protect your outdoor plumbing, and avoid paying for a service call. Just remember to shut off the water first, take it step by step, and don’t hesitate to call a plumber if the job turns out to be bigger than expected.
Regular maintenance is the best defense against future leaks, so make spigot checks part of your seasonal home routine. A few minutes of attention now can save you gallons of wasted water — and dollars off your bill — down the road.
