

To replace a dishwasher, turn off the power at the breaker and shut off the water supply. Disconnect the electrical wires, water supply line, and drain hose from the old unit. Slide it out, then connect the same lines to your new dishwasher, slide it in, level it, and run a test cycle.
Your dishwasher has been leaking, leaving dishes dirty, or simply giving up after years of hard work. Whatever the reason, knowing how to replace a dishwasher yourself can save you a couple hundred dollars in labor costs and get you up and running in just a few hours. The good news is that this is one of the more beginner-friendly appliance swaps you can tackle at home — no advanced plumbing or electrical experience required.
Most standard dishwashers are 24 inches wide and drop right into the same cabinet opening as the old one. As long as you’re replacing like for like in terms of size, you won’t need to touch your cabinetry at all.
When Should You Replace Your Dishwasher?

Before you buy a new unit, it’s worth knowing whether replacement is actually the right call. Sometimes a repair is cheaper and faster. But there are a handful of signs that clearly point toward getting a new machine.
If your dishwasher is more than ten years old, repairs start to make less financial sense. The average dishwasher lasts around ten years, and with good maintenance, sometimes up to fifteen. But once it starts needing frequent fixes, you’re usually better off putting that money toward something new.
Other clear signs it’s time to replace include dishes coming out cold or dirty after a full cycle, visible rust on the interior tub, a door that won’t latch properly, or water pooling on the kitchen floor after every wash. If your energy bills have crept up without explanation, an inefficient older dishwasher might also be contributing more than you’d expect. Modern models are significantly more energy and water efficient than units made a decade ago.
What You’ll Need Before You Start
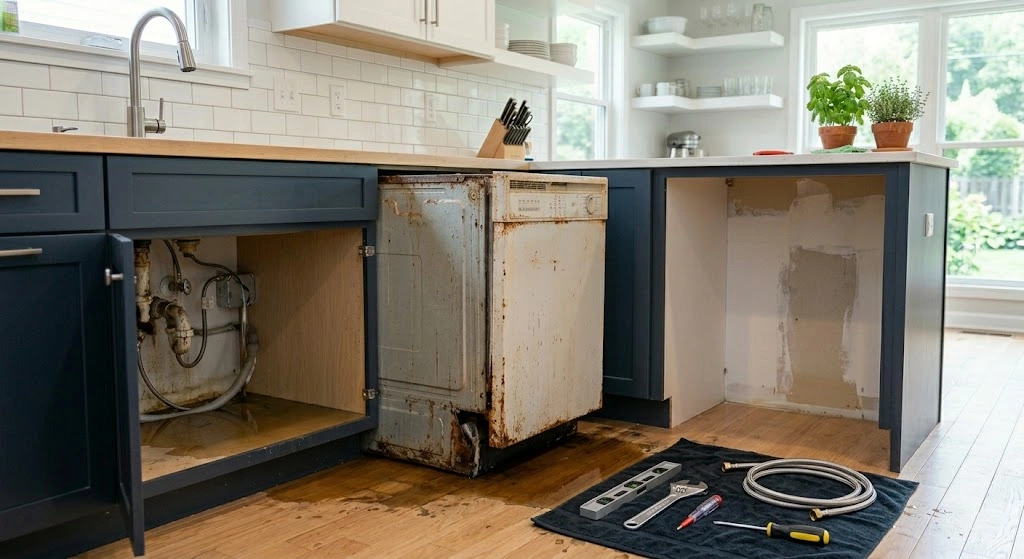
Getting your tools and materials together before you begin makes the whole job smoother. You don’t want to be hunting for a wrench while water is dripping on your kitchen floor.
You’ll need a flathead and Phillips head screwdriver, an adjustable wrench, a non-contact voltage tester, a bucket or shallow pan, a drop cloth or thick cardboard to protect your floor, and a torpedo level. Some jobs may also call for Teflon tape for the water supply connection and a wire stripper if you’re hard-wiring the new unit.
If your new dishwasher didn’t come with a braided stainless steel supply line, pick one up at a hardware store before you start. It’s worth using a new one rather than reusing the old line, especially if you don’t know how long it’s been in place.
Step 1: Turn Off the Power and Water Supply
Safety comes first. Head to your home’s main electrical panel and flip the breaker that controls the dishwasher. Once you’ve done that, use a non-contact voltage tester under the front access panel of the dishwasher to confirm the power is genuinely off. Never skip this step — even if you’re confident you’ve hit the right breaker.
Next, turn off the water supply. The shutoff valve is almost always located under the kitchen sink, close to where the dishwasher sits. Turn it clockwise until it stops. If you can’t locate a dedicated valve, you may need to shut off the main water supply to the house temporarily.
Place your bucket or towel nearby. There will be some residual water in the lines, and catching it now is much easier than mopping the floor later.
Step 2: Disconnect the Old Dishwasher
Open the dishwasher door and look up at the underside of your countertop. You’ll see two mounting brackets holding the dishwasher in place. Remove those screws. On some models, the brackets are on the sides rather than the top — check your existing unit before you start pulling.
Now remove the lower access panel at the front of the dishwasher by unscrewing the two screws that hold it in place. Once it’s off, you’ll see the junction box (for the electrical connection), the water supply line, and the drain hose.
Open the junction box cover and use your voltage tester one more time to confirm no current is present. You’ll see a black wire, a white wire, and a green ground wire. Unscrew the wire nuts connecting each pair and separate them. Release the ground wire from its screw. Then use your wrench to disconnect the water supply line from the inlet valve — keep your bucket handy here. Finally, loosen the clamp on the drain hose and pull the hose free from the sink drain or garbage disposal connection.
Lay a thick piece of cardboard or your drop cloth on the floor directly in front of the dishwasher. Adjust the leveling legs downward slightly to make sliding it out easier, then carefully pull the old unit forward onto the cardboard and move it out of the way.
Step 3: Prepare the New Dishwasher for Installation
Unbox your new dishwasher and keep the cardboard from the packaging — you’ll use it to slide the unit into place without scratching your floor. Leave any protective film on the appliance exterior until after it’s installed.
Tip the new dishwasher gently onto its back to access the bottom connections. This is where you’ll attach the 90-degree elbow fitting for the water supply line and route the drain hose and power cord. It’s easier to make these connections before the unit goes into the cabinet opening than while it’s already tucked in.
Attach the 90-degree brass elbow fitting to the water inlet valve at the bottom of the dishwasher. This is the connection point for your supply line. Wrap the threads with a couple of layers of Teflon tape first to create a watertight seal. Hand-tighten the supply line onto the fitting, then snug it down with your wrench — firm but not overly tight, as over-tightening can crack the fitting.
Route the drain hose and power cord through the back legs so they’ll be accessible once the dishwasher is in position.
Step 4: Slide In the New Dishwasher and Make Connections
With the new unit on its cardboard, carefully slide it into the cabinet opening. Go slowly and make sure the drain hose and supply line are feeding through correctly as you push it in. Don’t let the hoses get kinked or pinched behind the unit.
Once the dishwasher is roughly in position, connect the water supply line to the valve under the sink. Tighten it securely with your wrench. Reconnect the drain hose to the sink drain or garbage disposal and tighten the hose clamp with your screwdriver. If you’re connecting to a garbage disposal for the first time, you’ll need to knock out the plastic plug inside the dishwasher inlet port before attaching the hose.
Now connect the electrical wires. Match black to black, white to white, and secure each connection with a wire nut by twisting it clockwise until firm. Attach the ground wire to its screw. Tuck everything back into the junction box and replace the cover.
Step 5: Level the Dishwasher and Secure It
Before you fasten the dishwasher in place, check that it’s sitting level. Place your torpedo level across the inside of the dishwasher, both front-to-back and side-to-side. Adjust the front leveling legs up or down as needed. Getting this right matters — an unlevel dishwasher can leak, strain the door, and cause long-term wear on the pump.
Once it’s level and sitting flush with the cabinet face, reattach the mounting brackets under the countertop or to the sides of the cabinet, depending on your model. Replace the lower front access panel and press it back into place.
Step 6: Test Your New Dishwasher
Turn the water supply back on and check underneath the sink for any drips at the supply line connection. Then head to your electrical panel and flip the dishwasher breaker back on.
Run a short wash cycle — just the rinse cycle works well for a first test. During the cycle, check under the sink and around the base of the dishwasher for any water. If everything looks dry when the cycle finishes, you’re in great shape.
If the dishwasher won’t power on, double-check your wire connections in the junction box. If the machine runs but isn’t filling with water, verify the supply shutoff valve is fully open and that the supply line isn’t kinked.
How Long Does It Take to Replace a Dishwasher?
For most homeowners doing this for the first time, the full job — removing the old unit and installing the new one — takes between one and four hours. A plumber or experienced DIYer can often knock it out in under an hour. Don’t rush it, especially around the electrical connections and the water supply fittings. Taking an extra ten minutes to double-check your work is far better than dealing with a slow water leak inside your cabinets.
When to Call a Professional
Most dishwasher replacements are well within reach for a confident DIYer. But there are a few situations where it makes more sense to bring in a pro.
If your home has aluminum wiring (it looks dull gray, not copper-orange), stop immediately and call a licensed electrician. Aluminum wiring requires special connectors and handling that go beyond a standard dishwasher swap. Similarly, if you discover that your existing plumbing or drain setup doesn’t match what the new dishwasher needs, a plumber can sort that out quickly and safely.
If the cabinet opening needs to be modified because your new dishwasher is a different size, that’s also a job for someone with carpentry skills, unless you’re comfortable with that kind of work yourself.
Wrapping Up
Replacing a dishwasher is one of those home projects that looks more intimidating than it actually is. Once you understand the three main connections — water supply, drain hose, and electrical — the rest is mostly just careful disconnecting and reconnecting. Take your time with the safety steps, keep a towel nearby for drips, and make sure the unit is level before you lock it in.
With a little patience and the right tools, you can have a brand-new dishwasher running smoothly in a single afternoon — no service call required.